Inspirations

Inspirations
The color you see is the color you get!

Monday, February 28, 2011

PAINTED PRIMAS

Hello Everyone- This is Chris Dickinson Remember a few years ago when the big rage in flower land was these paper Primas? Well, they keep coming out with BETTER product yet we have these left overs laying around. ACK, of course, I buy all of the new stuff too, but need to be a wise steward and use up my older things too. In an effort to do this, I grabbed my Shimmery, fabulous Creative Inspiration Paints and thought I would make some leaves and paint my Prima flowers too, to match my card!
You can use any type of paint brush you wish! I used an Aquapainter. Choose your paint color and your Prima flower. I bought a large bin of white Primas, so I will be creating a leaf with this one!


Paint directly on the flower with the paints that you like. Be careful to not over saturate with water as you paint. If you do, carefully use a Heat Tool to dry the flowers.


I did not have the right color of rose, so I mixed my own color. I used a touch of Burgundy, Rose and Fairy Frost and painted the color directly on the second Prima.

Once the paint is dry, I trimmed the Prima flower to create more of a "leafy" look.


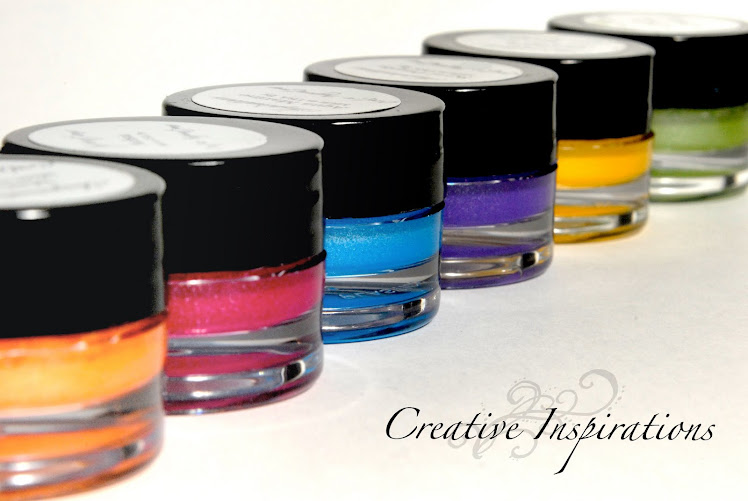
Don't you just love the shimmer with these paints???

 Here are a few more details:

Stamps: I Brake For Stamps -  Humorous Seniors, Whipper Snapper sentiment,
Paper: Craft, TPC Studio Ancestral DP, Espresso, White
Ink: Memento Black, Copics
Accessories: Zva Pearls, Creative Inspiration Paints Primas, Scallop Punch, Offray ribbon, Dimensionals, Glue Dots, mini Glue Dots - 


Thank you for stopping by and taking a peek! I hope you have a wonderful day!

Sunday, February 27, 2011

CI Paints Inspired By: Birthday's

Thanks to those who joined in our "Polka Dots and Stripes" challenge last week! 

Here are the Random.org Top 3 Picks:


CONGRATS ladies!! Great projects!! You each will recieve and extra entry in our monthly drawing!

You can grab this badge for your blog:

A friendly reminder that this is the last Sunday of the month, so that means next week a random person will be drawn from all the entries this month to win 5 jars of paint for themselves!  Check out all the paints here!
---------------------------------------------

Each week you will be given a challenge to find inspiration in/from what ever the challenge theme is... you can be as literal or abstract in your inspiration as you want... Just make sure you can tie it back to the theme! Challenge closes at 4:00pm Eastern on Saturday.

You will always be able to jump back to the current challenge by clicking the "Current Challenge" link in our sidebar. The rules can always be found by clicking the tab "Challenge Rules" at the top of the page.

You do not need to use the Creative Inspirations Paints in your project, however, if you do, tell us which colors you used, and your name will go in the drawing twice! Each month, one person will win 5 jars of paint in the colors of their choice. The winner will be randomly drawn from all the people who have played that month, so make sure to join in on our challenges each week!

---------------------------------------------

This week's challenge is:


Inspired By: Birthday's


This should be a pretty easy challenge as I think most of us are always make a birthday card for someone!

Here's some inspiration for you:

We can't wait to see what you come up with!

Have a nice day!

Kendra
--------------------------


Saturday, February 26, 2011

ruffles have shimmer...

You know those crepe paper streamers that you hang at kid birthday parties, or that were draped over everything at prom?  They are very inexpensive, and so much fun to play with! And of course, I use CI paints on them!  So grab some streamers and come play!

You will need:
crepe paper
Creative Inspirations Paint
heat gun
sewing machine (or needle and thread)

Step 1: Cut a piece of crepe paper.  You want it about 3-4 times the size you want it when you are done.

Step 2: Paint your crepe paper with Creative Inspirations paint.  You don't want to over saturate the paper, so just put on a thin layer of paint. 

Step3: Carefully pull your painted crepe paper off of your craft sheet. You can then set it back down in a clean spot. You just don't want it stuck for the next step.
(check out that shimmer!)

Step 4: Dry with a heat gun. 

As long as you haven't over saturated it, and you have made sure it isn't painted onto your table, it should crinkle back up to the wrinkly stretch way it was before. (except for it is now a custom color and shimmery!!!)

Step 5: Using a sewing machine, or needle and thread do a loose straight stitch without any backstitching.  Leave long tails. (the thread hanging out of each side)

Step 6: If you used a sewing machine, you should have 2 thread "tails" on both ends of your crepe paper.  (1 on each side for hand stitching). While holding one end of the crepe paper, pull one of the tails.  This should start bunching your crepe paper.

 You can gently work the bunches around until you get what you like.
 Fun, huh!

Ok, when I first learned this technique, I had no idea how to attach the ruffle to anything, and it took me a while to find a way I like.  I thought I would share with you. This is not the only way to attach it, just the way I like. =)

Step 1: run a line of dry adhesive (double sided tape or atg gun tape etc.) across your project where you want the STITCHED LINE of your ruffle to be. 

Step 2: Place your stitched line on the tape and press. By just taping the stitch line, your edges will remain free and fluffy.

Step 3: Flip your project over. Using clear tape, secure the ends of your ruffle to the backside. Make sure to catch the threads so they won't unravel.

You can then cover the stitch line with buttons, ribbon, flowers, etc.

Here is the completed card I made for my niece for St. Patty's day.  The flower is a hair clip I made for her, and is just clipped onto the ribbon.

Hope you have fun with this technique! I sure have been. =)

Friday, February 25, 2011

It's ok to color outside the lines!

Sometimes I find an awesome stamp, but the lines the artist drew can be distracting. Shaded areas that have strong outlines to them, sometimes tend to look unrealistic. What I like to do with this images, is not give up on the stamp! no! I like to grab my trusty London Fog grey ink from Memento, which is a nice light grey. I then use the lines as guidelines, but tend to go "ignore" them for shaded areas, as I did here with the fire. I then decided that I wanted my rocket to be bold, once filling it in with Silver Frost, so I outlines some areas with Onyx.


Since I plan on cutting out the image, it doesn't matter if I went a little outside the lines. I mixed Garnet and Mango to achieve this look.

Thursday, February 24, 2011

Bulletin Board

Hi everyone! I feel like before I show you all my project I need to make a couple of confessions. First of all, I love Target. I'm slightly addicted, but I'm dealing with it. ;) And secondly, I love finding good deals. I'm always searching for a good bargain. With that being said, I'm starting to gather stuff to decorate my scraproom (frugally, of course). I find awesome deals at Target all the time. Their clearance is AMAZING. Anyways, I found a tablecloth 75% off that is inspiration for my room. I also found a bulletin board in the Dollar Spot at Target for $2.50.
I covered the corkboard part with a scrap of fabric from the tablecloth and trimmed it with ribbon scraps. I painted the outside of the bulletin board with white acrylic paint first, and then I put 2 coats of CI Evergreen. Once it dried, I used a little Antique Gold and sanded it to make it look aged. And I made the pins by hot gluing old buttons that I found to push pins. Overall, I'm pretty happy with it! Thanks for looking!

-Dani

Wednesday, February 23, 2011

new colors!

Hey everyone!  
I'm jumping on here today to share with you some fabulous news!  

Remember when we introduced the 2010 limited edition colors?  These colors were only available until December 2010...

These are some of my very favorite Creative Inspirations colors. Apparently a lot of you felt the same way... We have had SO much interest in these colors even after they were discontinued, that Molly (the owner) just told me she has decided to add them to the permanent line up!  YAY!

April 1, 2011, these colors will be available for purchase here. If you are interested in buying locally, contact your local scrapbook store and let them know that you want to see Creative Inspirations Paint on their shelves. We'd love to talk to them! 
*Retailers click here, or email us here*

Burgundy 


Denium 


Beige


Ivory

Burgundy is a deep red-violet. Denium is a dark muted blue. Beige is a creamy light brown. Ivory is a soft off-white.
I'm SO excited about this, and I hope you guys are too! These are beautiful colors!

Thanks Molly!


Tuesday, February 22, 2011

Hibiscus

Hi, Barbara here. Today I'm sharing a card I did using the level up technique. I started with an image of a Hibiscus flower. The stamp is from Auntie Amy (now under I Brake for Stamps). I stamped the image six times. The entire flower was painted with CI paints. I used rustic red, garnet, sage, green olive, raw sienna, and burnt clay. On the second stamping I painted the flowers and the  leaves, cut them out and adhered them to the first image. On the third stamping I painted the flowers and the forward leaf, cut them out and adhered the pieces to the original image. For each stamping I painted the parts to be cut out and adhered them to the image -- the flowers, then the front petals, until finally just the front petal on the large flower. In real life, the image has a dimensional look. What makes these flowers especially striking is the vivid color and the shimmer created by using CI paints.

Monday, February 21, 2011

Shading with Paints

I love working with CI Paints, they really add a perfect touch to any card.

When I use CI Paints I tend to always use them to color in the entire area/image. For example this card I would have used the paint to color in the entire watering can...
 but  I decided not to color in the entire image with the paint, rather just use it to shade in little areas.

Here's a close-up:
I used CI Paint "Silver Frost" to add shading to this watering can. 
 It almost brings the watering can to life!!

I used CI Paint "Green Olive" to add shimmer to my chipboard swirls!

A friendly reminder to join in on our weekly challenge, we'd love to see what you create!  Plus you have a chance of winning some of these shimmery paints for yourself!  This week's challenge is "Inspired By: Polka Dots and Stripes".

Have a shimmery day!

Kendra

Sunday, February 20, 2011

CI Paints Inspired By: Polka Dots and Stripes

Great challenge entries once again!  Thanks!

This week's Random Top 3 are:

#23 Dawn Lancaster


#8 Zulma


#17 Grace N.


Beautiful cards ladies and congrats! You can grab this badge for your blog:


Hope you will join us again!
---------------------------------------------

Each week you will be given a challenge to find inspiration in/from what ever the challenge theme is... you can be as literal or abstract in your inspiration as you want... Just make sure you can tie it back to the theme! Challenge closes at 4:00pm Eastern on Saturday.

You will always be able to jump back to the current challenge by clicking the "Current Challenge" link in our sidebar. The rules can always be found by clicking the tab "Challenge Rules" at the top of the page.

You do not need to use the Creative Inspirations Paints in your project, however, if you do, tell us which colors you used, and your name will go in the drawing twice! Each month, one person will win 5 jars of paint in the colors of their choice. The winner will be randomly drawn from all the people who have played that month, so make sure to join in on our challenges each week!
---------------------------------------------

This week's challenge is:


Inspired By: Polka Dots and Stripes

Here's a card for some inspiration:

I used "Fairy Dust" to cover the polka dots on the egg, her bow and "Tutu Pink" on the flowers.


We look forward to seeing your creations!  Happy crafting!

Kendra
-----------------------------------------

Saturday, February 19, 2011

stuck on tiles...

Hello everyone!  I hope you are having a wonderful weekend, and that you are ready for another tutorial to get you inspired!  Today's project features something from the home improvement store... mosaic tiles!

What you need:
Mosaic tiles (I got a small pack at Home Depot for cheap)
Bowl
Warm water
Creative Inspirations Paint
StazOn ink
Stamp
Glossy Accents (by Ranger)
Magnets 


 This is what my mosaic tiles look like... There are many sizes and colors to choose from.

 Step 1: The tiles come glued to a mesh backing. You will need to peel the tiles off the mesh. 

 Step 2: Soak the tiles in warm water for a few minutes. This will soften the glue that is still on the tiles.

Step 3: Using your finger, rub the glue off the back of your tiles.

Allow to dry.

 Step 4: Apply Creative Inspirations paint to your tile. This may take more than one coat. 

*note: if you are using the smooth glass tiles, you may want to tap the tile in embossing ink, then cover with clear embossing powder.  Heat.  Now try painting. The melted powder will hold the paint better than the smooth glass*

Step 5: Ink up your stamp with StazOn ink (or any ink designed for non-porous surfaces), and stamp onto your tile.  *Depending on the stamp, and your personal preference, you may want to ink up your stamp, lay it down on the table ink side up and press the tile onto the stamp. Either way works, it just depends on which way you like better.

 Step 6: Put a dot of Glossy Accents onto your magnet. I like to use Glossy Accents because it is super strong and will hold all kinds of different materials together.

 Step 7:  Press the magnet firmly onto the back of your tile. 

IMPORTANT: give this plenty of time to dry.  If the glue is not completely dry, the magnet will slide off and make a mess... trust me on that one... LOL!

 When it is dry, you have bright, shimmery, custom magnets!

I took these over to my Mom's house to show her... Let's just say her fridge is now full of fun color while my fridge is STILL in need of magnets. Guess I'll just have to make more. =)