Inspirations

Inspirations
The color you see is the color you get!

Friday, November 29, 2013

A Barrow of Blessings

Hi everyone, Julie here today from Muddy Paws & Inky Fingers hoping you had a great Thanksgiving yesterday (American friends). We have much to be thankful for, don't we?

We spent yesterday noon having Thanksgiving dinner with my father at the assisted living facility where he lives. My father was a carpenter by trade and spent many hours taking care of his yard when he wasn't working.  His yard became even more important to him after he retired.  I wanted to make him a little something to have on the table that he could share with his table mates and friends. With that in mind, I found what I thought would be the perfect Thanksgiving table décor:
 
 
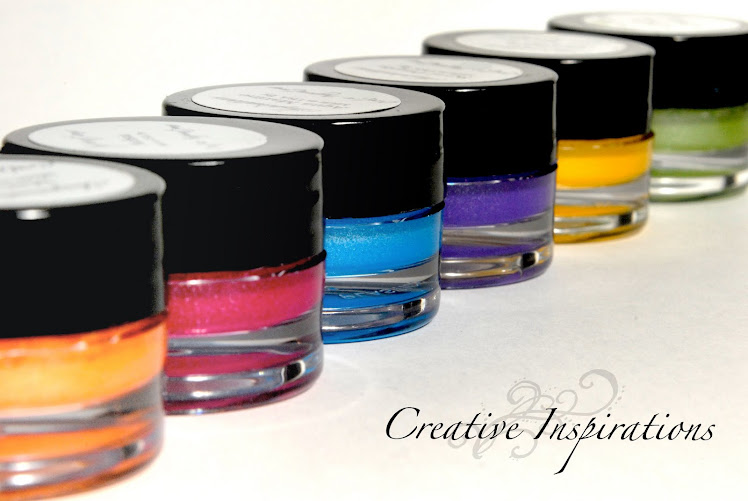
I had this idea for a wheelbarrow, and looked around until I found what I wanted.  This is a wheelbarrow treat box.  You can see it's been embellished with leaves painted with Creative Inspirations Paint. Here's a view of the other side.
 
 
  The leaves started out white. I painted the die cut leaves with Creative Inspirations Paint to give them those beautiful Fall colors and shine. I used a variety of different Creative Inspirations Paints on the leaves -- Burnt Clay (on sale), Autumn Wheat, Sunshine, and Pumpkin (on sale).
 
Here's a little peek into the box...
 
And, one more view, showing you how big the box is:
 
 
My father and his friends had plenty of candy to munch on all Thanksgiving afternoon!
I hope you enjoyed one more Thanksgiving project before we rush headlong into Christmas.  Hang on tight, it'll be a whirlwind month!


Wednesday, November 27, 2013

Happy Thanksgiving ...

This week is a celebration of gratitude and family, and as my brothers and sister arrive for the holiday, I'm filled with thankfulness and blessings! Wishing you and yours the Happiest Thanksgiving full of laughter, love and yummy food and always be thankful for what you have, for there are many others who are less fortunate! ~ Enjoy!


I've created my scenic sunset using Buttercup, Raw Sienna, Pumpkin, Burnt Clay, Rustic Red, Burgundy and Coal in that order with a wet paintbrush. My poppies are die cut from black cardstock and a sentiment and bow finishes the card.

 
Each 1st Monday we will now be sharing 4 Creative Inspiration Paint Colors of the Month and those colors will be on sale for the entire month at 33% off of the original price! For this month the colors for the Fall Season are Burnt Clay, Pumpkin, Raw Sienna and Rustic Red!
I've used these colors on my card: 
 

Tuesday, November 26, 2013

♪♪ It's beginning to sound a lot like Christmas! ♪♪

Hello and Happy Tuesday!  Tina here today with a project that will get you in the holiday spirit!

I can't believe Christmas is only a month away.  It seems like Summer was just yesterday!

Tags are one of my favorite, 'no-brainer', easy projects.  I could spend all day creating one tag after another.  They are so fun and so easy, they are a great way to try new product or experiment with new techniques.


I started my tags with an ombre painted effect, using a favorite star stencil.  Starting with my darkest color on the top of each tag, I used 4 greenish hue's to complete my background.
{Hint:  I used a cosmetic sponge to apply the paint to the tag.  Lots of control and you can cut the end off when you are done with one color to use on the next.}


Once my paint was dry, I layered holiday themed die-cuts, tags, and fun embellishments.


I also love to color my embellishments to match the colors of my project.  I have colored my ribbon with stains and inks in the past, but wanted to see if it would work with CI paints.  It did!  Beautifully!

I sprayed my ribbon with water, then dipped my fingertips into the lightest color first.  I randomly rubbed the ribbon with this color, then repeated with 2 additional colors.  Once I was happy with the color, I crinkled the ribbon into a ball and dried with my heat gun.  Once it was dry, the beautiful shimmer from the paint looked gorgeous on my new custom-made ribbon.  I will definitely be trying this technique again!


That's all for today!  I hope this inspired you to create something for the holiday!  We would love to see your creations!


Monday, November 25, 2013

A Grungy Butterfly


Hi friends! I don't know about you, but this week is going to be super busy for my family! Since Thanksgiving is on Thursday, we will be doing some traveling the day before to go see my fiance's family in Ohio. I always look forward to these trips! Since this week is going to be busy, I was able to get some projects done this weekend, and today's project is one of them. I am so pleased with the way this turned out. I can't wait to share it with my LSS, where it will be displayed. :) 

I decided to go grungy for this canvas, with lots of textures, including fabric, metal, pastes and of course, Creative Inspirations Paint on this... 


The canvas was covered with Tim Holtz Eclectic Elements Fabric. I used some CI Paints in Antique Gold and Antique Copper on the sides and front. Using a stencil and some Viva Decor Ferro in Graphite, I added the circles to the corners and sides. My butterfly is a page from the Genuinely Jane Studios Butterfly Album that I used more Graphite Ferro on using a Brick Stencil. I painted the empty spaces in the butterfly and it's sides using Creative Inspirations Onyx Paint. I added Antique Silver to each brick and dry brushed more Onyx back over the bricks for an aged look. 


I've been completely in love with the Patina look, and using some Sea Foam over the Antique Gold, I was able to create a slight faux patina look. It isn't perfect, but it looks fine for what I was going for. You can see it better in the photo below:


To add to the grunge look, I threw on some gears and the key hole to the butterfly. I brushed Onyx over them as well. 


I hope you've found inspiration in my canvas today! 

Enjoy your week and have a wonderful Thanksgiving! 

www.emilyhammann.com


Sunday, November 24, 2013

Inspired by: Anything goes Week #2


 ---------------------------------------------

This is week #2 of challenge 
Inspired By: Anything Goes

Hi  Everyone, DIANA L. here from DL.ART  with today's inspiration 
challenge for you:


Here's some inspiration:


With Christmas around the corner I thought I would create a card for the Holiday.
I tore three pieces of Rives Kraft card stock and embossed the edges with Creative Inspirations deliquesce white. I love the effect of the torn paper, but adding the embossing powder gives it and extra element  of dimension. The tree is formed using the resinesence and copper and green sparkle embossing powder in a silicone mold.  Here is a close up so you can see the detail


Creative inspiration  Products used:


I hope you have enjoyed my project and will play along with this week's challenge!!
Remember you do not need to use CI Paints on your projects but if you have them we would LOVE to see how you used them!!
As always thanks for stopping by and
have a great week!

DIANA L.
for more information on my project come visit my blog at
http://dianamlarson.blogspot.com

---------------------------------------
General Challenge Rules

Each week you will be given a challenge to find inspiration in/from what ever the challenge theme is... you can be as literal or abstract in your inspiration as you want....Just make sure you can tie it back to the theme! Challenge closes at 6:00pm Eastern on Saturday.
You will always be able to jump back to the current challenge by clicking the "Current Challenge" link in our sidebar. The rules can always be found by clicking the tab "Challenge Rules" at the top of the page.
You do not need to use the Creative Inspirations Paints in your project, however, if you do, tell us which colors you used, and your name will go in the drawing twice! Each month, one person will win 5 jars of paint in the colors of their choice. The winner will be randomly drawn from all the people who have played that month, so make sure to join in on our challenges each week!
---------------------------------------------

Saturday, November 23, 2013

stuck on glitter...

Tis the season for glitz and glam!

Hello my wonderful friends!

 Are you ready to get sparkly? 

I've noticed in the stores a fun thing... glitter tape.  It's just what it sounds like... a roll of tape that is glitterized. Well, that got my brain to thinking...

That's fun and all, but...

You guessed it, I wanted more control! I wanted it to match MY projects, MY colors, MY patterns, and MY style! I didn't want to have to match my work to what the STORE decided to carry! UGG!

But, when has that really stopped me before?  It just forces me to be a little more creative. :)

So, here is a fun way to make YOUR OWN glitter tape. (well, more like glitter ribbon...)

Step 1: Stamp a design onto tissue paper.

Step 2: Cover with a strong double sided adhesive, and trim off extra tissue... I like to use a double sided adhesive that comes in a sheet so I can cut it to the size and shape I want. I'm using a Silhouette Double Sided Adhesive sheet here.

Step 3: Peel off the back of the double sided adhesive and cover in Creative Inspirations Angel Dust Resplendence.  Press the glitter onto the adhesive and brush off the extra to return to the jar.

The fun thing about this technique, is not only is it totally customizable, but it is also semi-transparent, and you can tint it by rubbing on a little distress ink to the tissue paper side of the tape. Of course you can make plain glitter tape by simply covering one side of the double side adhesive with any color Resplendence glitter, then using the back side to adhere it to your project.

The glittered tissue tape will have to be attached with an adhesive like a glue runner or another piece of double sided adhesive... or, you can do what I did here..,

Because the back is not sticky, and it is stabilized by the tape, it can be tied in a bow. 

Not your average glitter tape, huh!

Enjoy!
~Kassi


Friday, November 22, 2013

A Shabby Christmas Banner

Hello everyone. Monica here with  my project for this week. I wanted to make a banner to hang on the mirror over my fireplace and I wanted it to be shabby to go with my decor.

I started with burlap and heavy card stock. After cutting the burlap base, I cut the card stock smaller than the burlap, then crumpled it in my hand. I painted two coats of Creative Inspirations Tan for the base. After it dried I used Tim Holtz vintage photo with the blending tool over the high spots on the wrinkled paper, then some soot to bring out more depth. I then used a paper punch to achieve the lace look edging and used my fingers to cover that with white Gesso, then highlites of Creative Inspirations Ivory.

I sewed the paper to the burlap, this was a challenge. Burlap is not easy to sew on but I was determined.

I then stamped the circular lace onto cardstock with Tim Holtz vintage photo, then cut out the edges and center and sewed it to the burlap and paper banner piece.


The blue in the middle lace stamp is painted with Creative Inspirations Turquoise, which I then stamped over with white gesso to bring out the detail. Lightly rubbed some vintage photo over that to give it a more vintage look. The typewriter key letters are just printed from online.


I dry brushed the flower trim with the Tim Holtz Vintage Photo then brushed over that with the Creative Inspirations Tan...


As always, the shimmer on these pieces is amazing and I love how it all turned out.


Thanks for stopping by today. Hope your Holiday's are filled with Joy!!
Monica

Thursday, November 21, 2013

A Shimmery Vintage Thankful Card!


                                         Happy Thursday CIP Fans!
We are one week away in the US in celebrating the Thanksgiving Holiday!
I created a vintage Thankful card to celebrate the upcoming Holidays.
For the background I used a vintage Bingo card I found in a antique store.
I added a crackling medium and then used the Antique Gold from CIP for color!
For the berries I used Antique Copper and for a little more color on the
leaves I used Evergreen.
The colors on the burlap flowers I used Raw Sienna, Rustic Red and Burgundy!
A close up here below where you can see all the amazing shimmer!!


Here's the card!


The amazing CIP colors!


Have you heard about the 4 Creative Inspirations Paint colors that are 33%
on sale all month long?! 2 of the colors I used on my card are on sale!
The Raw Sienna and the Rustic Red!
Here's the link for the 4 colors that are on sale at 33% off!
How about a chance to win some of the CIP amazing paints?
Join in on our challenge and we will add your name for a chance to win 5 CI paints!
Here's the link to the Anything Goes challenge!
Thanks for visiting the CIP blog today! 
Michelle