Inspirations

Inspirations
The color you see is the color you get!

Saturday, July 30, 2011

custom transfers...

I don't know about you, but I love the rhinestone, rhinestud, and nailhead transfer designs that can be seen everywhere from clothes to scrapbooks!  Have you ever wished that you could make your own?  Choose your own colors, patterns and size?  Well, let me share a little secret with you...

You can!

I've already shared a video showing how to make a template with an electronic die cutter, but what about those who don't have one, or don't want to spend the time carefully arranging circles?  Well, you can free hand the design if you are so inclined, but I find an easy way to design is by using stamps. 

Today I'm going to be using the new Metallic Inspirations. I love how thin they are! Perfect for that extra bling without the extra bulk!

What you need:
Metallic Inspirations
Simple Stamp
Staz-on ink
Acetate
Vinyl (or heat transfer tape)
Strong Liquid Glue

*when choosing stamps to use, keep these two things in mind: 1) keep it simple. The size of the Metallic Inspirations or Jeweled Inspirations will determine how detailed you can go. The larger the stone, the less detail you can make. 2) you don't have to use the entire image of any one stamp, and you can combine stamps together to get a whole new look. Try it!

 Step 1: Using Staz-on ink, stamp your image onto a piece of acetate. 

 Step 2: Carefully arrange your Metallic Inspirations on your stamped design. Remember that the stamp is just a guide line. You don't have to follow it exactly. I decided not to do the flower or the leaves on this image.

*I have found that a good pair of tweezers is very helpful for this!*

 *If you have heat transfer tape, go ahead and use that, but since I don't, I use what I have around... scraps of vinyl. (contact paper would probably work to, although I haven't actually tried it.)*

Step 3: Without moving any of the Metallic Inspirations, press the sticky side of the vinyl on top of your design. Run your finger over the design to make sure all your Metallic Inspirations are firmly sticking to your vinyl. 

 Step 4: Flip your design over and slowly peel away the acetate. Start at one corner and slowly work the acetate off. Watch to make sure all the Metallic Inspirations are staying firmly stuck in place on the vinyl. 

 *If you are using heat transfer tape, simply iron on to your project.... DON'T iron if you are using vinyl!)*

Step 5: Put a small dot of a strong liquid glue on the back of each Metallic Inspirations. (I like to use Glossy Accents because it works well with both the paper and the metal)

 Step 6: Lay your design (glue side down) onto your project. Run your finger over the design to ensure all the Metallic Inspirations are attached. 

Step 7: Allow to dry. (this may take a while depending on which glue you use, and what you are gluing your design to. Don't rush it.)

 Step 8: When all the glue is dry, slowly peel off the vinyl starting at one corner and working your way across. Your custom design is now successfully transferred!


Enjoy!

Friday, July 29, 2011

storage tip...

Hey everyone! 

I'm here today to share a quick tip on storage. 

When I first got my Metallic Inspirations and Jeweled Inspirations, I knew I needed a good storage system to keep them all organized and easy to access. I found this container made for bead storage, and it works great! Don't all those colors just look amazing! 


On the top side of the lid, I have stickers over each box labeling it with the color and size so I know exactly what I need to order when running low. 

Another great way to store these is in the daily pill counter boxes.. You know, ones that hold a week's worth of pills divided into the days...

Enjoy!
~Kassi

Thursday, July 28, 2011

A Christmas ATC Folder

It's Christmas Inspiration this week.  I've joined an ATC swap at CDAC and in anticipation of receiving 9 beautiful ATC'S, I've made a folder to put them into.


 I painted the lace with CI Paint, 'Mocha Latte'.  Can't help but love paint with a name like that!  The roses were a bright pink, so to tone them down I used 'Rustic Red' and Burgundy'.  I then tipped the edges with 'Gold'.  I love the variations of color and the shimmer!

The book was made with some paper bags I had left over from an earlier mini album project.  I used my deckle scissors to trim the edges, inked them and then sewed the edges.  I used some Tim Holtz stamps and then spritzed all the pages with my homemade glimmer mist made with CI Paint 'Gold'.  Some more gorgeous shimmer! Otherwise, I left the pages plain so that the focus would be on the ATC's.

Thanks for entering our challenge and have a blessed day!

Tuesday, July 26, 2011

Vintage Christmas in July

Christmas is less than five months away. The weather is in the 90's. What better time to celebrate Christmas than in July. I love the vintage look and Santa here is a fabulous vintage image. Santa is from Artistic Outpost Snowy Woods.
To create my card, I first stamped Santa in sepia. I then finished the image with the vintage art technique from the current TJ newsletter. After the ink was dry I used some of the snowflake stamps from the set and stamped them over the image using fairy dust CI paint. I love the effect of the shimmery snowflakes over the image. I then cut out the frame using a Spellbinders die. One thing about many of their dies is the ability to stencil using the die. I used evergreen CI paint to stencil the embellishment on the frame. Again, a bit of shimmer really adds richness to the frame. The jingle bells were made using a punch and then covered with gold glass beads.
I hope everyone has a merry Christmas in July!
Barbara Washington

Monday, July 25, 2011

I Love Snow!

Our challenge this week is "Chritmas In July"!  What a great way to get a start on those Christmas cards!  And also a chance at winning some CI Paints of our own!!

I created a wintery card that I would like to share with you today:

Close-up of rhinestones and shimmer:
I used "Winter Frost" to add some yummy shimmer to parts of this fun stamp.  I don't know about you, but I have been so excited over the fact that CI Paints is now selling hot fix embellishments!  I just love the Jeweled Inspirations and the Metallic Inspirations!!

Have a great week!

Kendra

Sunday, July 24, 2011

CI Paints Inspired By: Christmas


Thanks to all those who joined in last week and shared their inspired by "your favorite die" creations!  See the Random.org Top 3 below!

---------------------------------------------

Each week you will be given a challenge to find inspiration in/from what ever the challenge theme is... you can be as literal or abstract in your inspiration as you want....Just make sure you can tie it back to the theme! Challenge closes at 4:00pm Eastern on Saturday.

You will always be able to jump back to the current challenge by clicking the "Current Challenge" link in our sidebar. The rules can always be found by clicking the tab "Challenge Rules" at the top of the page.

You do not need to use the Creative Inspirations Paints in your project, however, if you do, tell us which colors you used, and your name will go in the drawing twice! Each month, one person will win 5 jars of paint in the colors of their choice. The winner will be randomly drawn from all the people who have played that month, so make sure to join in on our challenges each week!

---------------------------------------------

This week's challenge is:

Inspired By: Christmas


Here's two cards for some inspiration:

With Christmas being 5 months away, lets see those Christmas or Wintery cards!

Have a great week! 

Kendra

---------------------------------------

Inspired By: Your Fav. Die Random.org Top 3

Thanks to those who joined us last week for our "Your Favorite Die" challenge!  Dies are so much fun to create with!  Great creations!

Here are the Random.org Top 3 Picks:

#7 Lou Mac


#5 Heather D


#2 Carrie on Crafting


Beautiful work ladies!

You each will recieve an extra entry in our July drawing for some CI Paints of your own!

You can grab this badge for your blog:

Saturday, July 23, 2011

distress with contrast...

Hey everyone! I'm glad you stopped by!

Today's technique is a twist on an old favorite... stamping with paint...

This is a great way to spice up a background for a card, scrapbook page, art journal, or any other fabulous projects you are working on!

What you need:
Creative Inspirations Paint
Project base
Paint Brush
Make up wedge
Stamps
Acrylic Paint

Step 1: Paint some Creative Inspirations Paint onto your base.  I like to leave at least some of the background for contrast in both color and shimmery-ness.  (I'm sure that's a word. LOL!)
 My project base is a cardboard square that has been given a base coat of acrylic paint  (this helps the color sit on top instead of seeping into the cardboard). I then brushed on Royal Purple CI paint for a nice contrast.  I wanted it to have a very playful and free feel to it, so I kept it messy... If you don't like that look, go ahead an do a nice even layer. It's up to you (that's one thing I love about art!)

Step 2: While the CI paint is drying, use a makeup wedge to dab a thin layer of acrylic paint onto your stamp. 
 I'm going with white acrylic paint to match my base coat. (you'll see why in a sec)

Step 3: Stamp onto your project.
 If you have never stamped with paint before, you may want to make a few practice runs to get the feel of it. If you have too much paint on your stamp, you will end up with a mess of squished paint. (yes, I've done it). If you don't have enough paint you will not get a good impression (but that might be the look you are going for...) Keep in mind that paint will not hold detail like ink will, so don't use stamps that are  filled with fine detail.

Step 4: Allow paint to dry.

Because I used white acrylic paint to stamp, you can see some of the dark purple showing through the paint, but it is looks faded and distressed. Using acrylic paint also hides the sparkle, which I think really helps highlight the shimmer by giving contrast.


Step 5: *optional* repeat steps 1-4 with as many colors and stamps as you so desire. Let each layer dry before adding more to avoid getting muddied colors.  I actually added some Sky Blue and Pink Highlights CI paint in at the bottom of my project, but forgot to get a photo of it... 

So have fun using CI paints, acrylic paints and stamps to a jazz up your backgrounds!
Enjoy!

Friday, July 22, 2011

mix it up..

Hey everyone!

I'm here once again to spread a little inspiration with a quick tip...

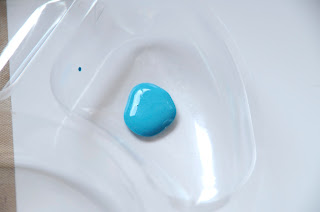
Even though Creative Inspirations Paint come in 59 fabulous colors, why stop there?  There are limitless color possibilities when you step into the fun world of mixing!

This color was made with appox. 2 parts Royal Blue to 1 part Sunshine...  

Here are some basics to get you started:
blue + yellow = green
blue + red= purple
red + yellow= orange
color + white= lighter color
color + black = darker color
color + brown= muted color

What colors can you make?  I'd love to hear what mixes you use!
~Kassi

Thursday, July 21, 2011

Santa and his Rein-dillos!

Ho ho ho!!!!! Yup, you read that right - Rein-dillos!!!! Santa doesn't have reindeer in Texas because it's just too darn hot for those reindeer. Ever resourceful, Santa loads up his special armadillos when he gets to the Texas border. Hee hee hee!!!


How's that for a fun Christmas card? :-) I watercolored this Santa & Dillos image from Eureka with some dye inks. I sponged "dirt" around the armadillos and I sponged around the entire piece with some dark blue ink and used a white gel pen to add some stars to the sky. The yellow stars & gift bag and the black wrought-iron work around the sleigh were painted with Sunshine & Onyx Creative Inspirations Paints. You can see the shimmer here:


I used the Faux Chipboard technique to create this star and this is also painted with some shimmery Sunshine Creative Inspirations Paint:


Stamps: Santa & Dillos and Ho Y'all from Eureka Stamps
Ink: Jet Black Stazon, Not Quite Navy, Blush, Basic Grey, Caramel, Red, Going Gray, Pumice Stone distress
CS: Red, Kraft, White
Other: sponges, aquapainter, glossy accents (dillo nose), white gel pen
Creative Inspirations Paint: Onyx, Sunshine
TJ Technique: Faux Chipboard

Wednesday, July 20, 2011

Nautical card - Kianel

Hello,
Kianel here with you today presenting the card i made for the last challenge at TOMIC which theme is nautical.
I have coloured my Magnolia stamp with a mix of water + distress + Creative Inspirations paint "sky blue" "gold" and "fairy dust".All flowers are also covered with CI paint "fairy dust" + water to give them a shimmery look.
Here is the detail of the colouring:
Have a wonderful time, and don't forget to pop by every sunday for a brand challenge at CI paints and the opportunity to win the magical jars! And don't forget the gorgeous "metallic inspirations" and "jewels inspirations"! Love from France, Kianel.

Tuesday, July 19, 2011

Fruity Inchie Magnets

Hey everyone. Carole here. Have you ever needed something quick and easy to add to a small gift or to jump start your mojo? Well, I needed a quick pick-me-up for myself, so I made some little inchie magnets for my fridge. I thought it might be fun to use parts of some larger stamps (by Unity) instead of using my dedicated inchie stamps, so I only inked up parts of them at a time before stamping. The larger the stamp, the less of it you need to ink. For the cherry, I did ink nearly the entire thing.

Once I had compositions I liked, I painted them with Chocolate, Garnet, Evergreen, and Green Olive CI Paints.
It's pretty easy to see the sparkle and shimmer, although I do wish the photo had been clearer. It was either get the details of the cherry, or get the glimmer of the paint. I went with the sparkle. These little guys make me smile when I see them holding up coupons or the latest grocery receipt. Hope you all have a wonderful week.

Monday, July 18, 2011

House Mouse Meets the Color Wheel


Hi there. Beth Norman here with a quick tutorial for you. In keeping with this week's challenge, I picked my scallop die as my favorite. I like it because it is easy to use, unlike some of the intricate dies.

This image was so fun to color (with my Copics), and paint with Creative Inspirations paint. Because the bubblegum was painted, the shiny outside looks just like real bubblegum--good enough to chew. How fun for the recipient of my card.

On the inside I stamped, "You Make Me Smile All Over My Face" from Inkadinkado. My main image is from House Mouse stamps.


To choose my papers, I turned to my color wheel. The Web Wheel has so many colors to choose from on the wheel. Although this wheel is made for beaders, scrapbookers and cardmakers can find this useful as well.


I used the color wheel to determine what colors worked well together on this mat.

Continue to use the color wheel to pick more colors.

The color wheel is a handy tool and a must have in my studio.

Sunday, July 17, 2011

CI Paints Inspired By: Your Favorite Die


Thanks to all those who joined in last week and shared their "wedding" creations!

---------------------------------------------

Each week you will be given a challenge to find inspiration in/from what ever the challenge theme is... you can be as literal or abstract in your inspiration as you want....Just make sure you can tie it back to the theme! Challenge closes at 4:00pm Eastern on Saturday.

You will always be able to jump back to the current challenge by clicking the "Current Challenge" link in our sidebar. The rules can always be found by clicking the tab "Challenge Rules" at the top of the page.

You do not need to use the Creative Inspirations Paints in your project, however, if you do, tell us which colors you used, and your name will go in the drawing twice! Each month, one person will win 5 jars of paint in the colors of their choice. The winner will be randomly drawn from all the people who have played that month, so make sure to join in on our challenges each week!

---------------------------------------------

This week's challenge is:

Inspired By: Your Favorite Die


Here's a card for some inspiration:
I just love this butterfly die!

Close-up of the butterfly:
I used CI Paint "Tutu Pink" to add shimmer to the butterfly!  I also used some of the new hot fix jewels and metallic inspirations on this card!

Have a great week!

Kendra

---------------------------------------


Inspired By: Weddings Random.org Top 3

Thanks to those who joined us last week for our "Wedding" challenge! 

Here are the Random.org Top 3 Picks:

Beautiful work ladies!

You each will recieve an extra entry in our July drawing for some CI Paints of your own!

You can grab this badge for your blog:

Saturday, July 16, 2011

one-of-a-kind...

Welcome back everyone!

In many ways, I tend to be a perfectionist... This can lead to quite a bit of frustration when it comes to art.  I have found that I sometimes need to just step back and enjoy the little imperfections that make each piece unique.  One way I can do this is by using techniques that are not exact... doing things that you just don't know how they will turn out until the end.  I find if very fun and liberating! Join me today in making some on-of-a-kind art that is fun, and looks really cool!

What you need:
Creative Inspirations Paint (any color)
Non-porus surface for mixing
Glaze Base
Mixing stick (something to stir paint with)
Glossy Paper (I like Ranger's)
Plastic Cling Wrap


Prep work:  have a piece of plastic cling wrap that is larger than your project cut and sitting out on your table.  You will need to grab it quickly, and don't have time to spend struggling with the frustratingly stubborn plastic in the middle of the project. *or maybe it's just me who is cling wrap challenged...lol!*


 Step 1: Place some CI paint on you mixing surface (I'm recycling a plastic food tray).  The amount of paint you need will depend on the size surface you are going to paint.. This technique needs to move fairly quickly, so make plenty.... you won't have time to stop and mix more once you start.

Step 2: Add some Glaze Base. I don't have any exact measurements for this, I just add some. The purpose of the glaze base is to extend the drying time... other wise, your paint will dry too quickly on the page.

*I find my glaze base in my local craft store will all the cheap acrylic paints. (Don't be confused... I'm talking the cheap acrylic paints for tole painting, not the fine art acrylic paints!)*


Step 3: Using a mixing stick (aka: toothpick, paint brush handle, spoon...whatever)  stir the glaze and paint together until completely mixed.

Step 4: Working quickly, paint your glossy paper with your CI glaze mix. At this point, it doesn't need to look pretty, just get it all covered before it starts drying anywhere.

*you can do this same technique with regular paper, but the effect is muted. I love the look on glossy paper!*

 Step 5: Lay your cling wrap on your wet paint and press. Again, you aren't going for pretty at this point. In fact, the more wrinkled it is, the more interesting the end result. Feel free to smoosh the paint around under the plastic to get rid of any brush marks and arrange the wrinkles how you like them. 

Step 6: set it aside to dry WITH the plastic wrap on it. 

 Step 7: Once all the paint is completely dry, peel off the plastic wrap. 

 You now have a one-of-a-kind beautiful paper! 

I turned mine into a beach scene card...

 If you are using glossy paper and you put on a thick layer of paint, you will even have some raised texture!


enjoy!