Inspirations

Inspirations
The color you see is the color you get!

Friday, June 18, 2010

truffles anyone?

Hello all my friends! It's Kassi, here with exciting news!!!!
Blog Truffles!
Yup, Molly told me she wants to give one lucky winner 5 jars of Creative Inspirations Paint (in the colors of their choice)!!!
So, how can you win? Well.... Nope, I'm gonna post some inspiration before I tell you. hehehe :)
Today I have some fabulous ideas for taking your flowers from drab to fab! *and you don't even need to have a green thumb.... good thing too, at least for me...*
Adding color and shimmer to your paper and silk flowers is so easy with CI paint!

Let's start out simple... cover your entire flower with the paint of your choice (make sure to shake the jar first for luck... I mean to mix in the sparkles).
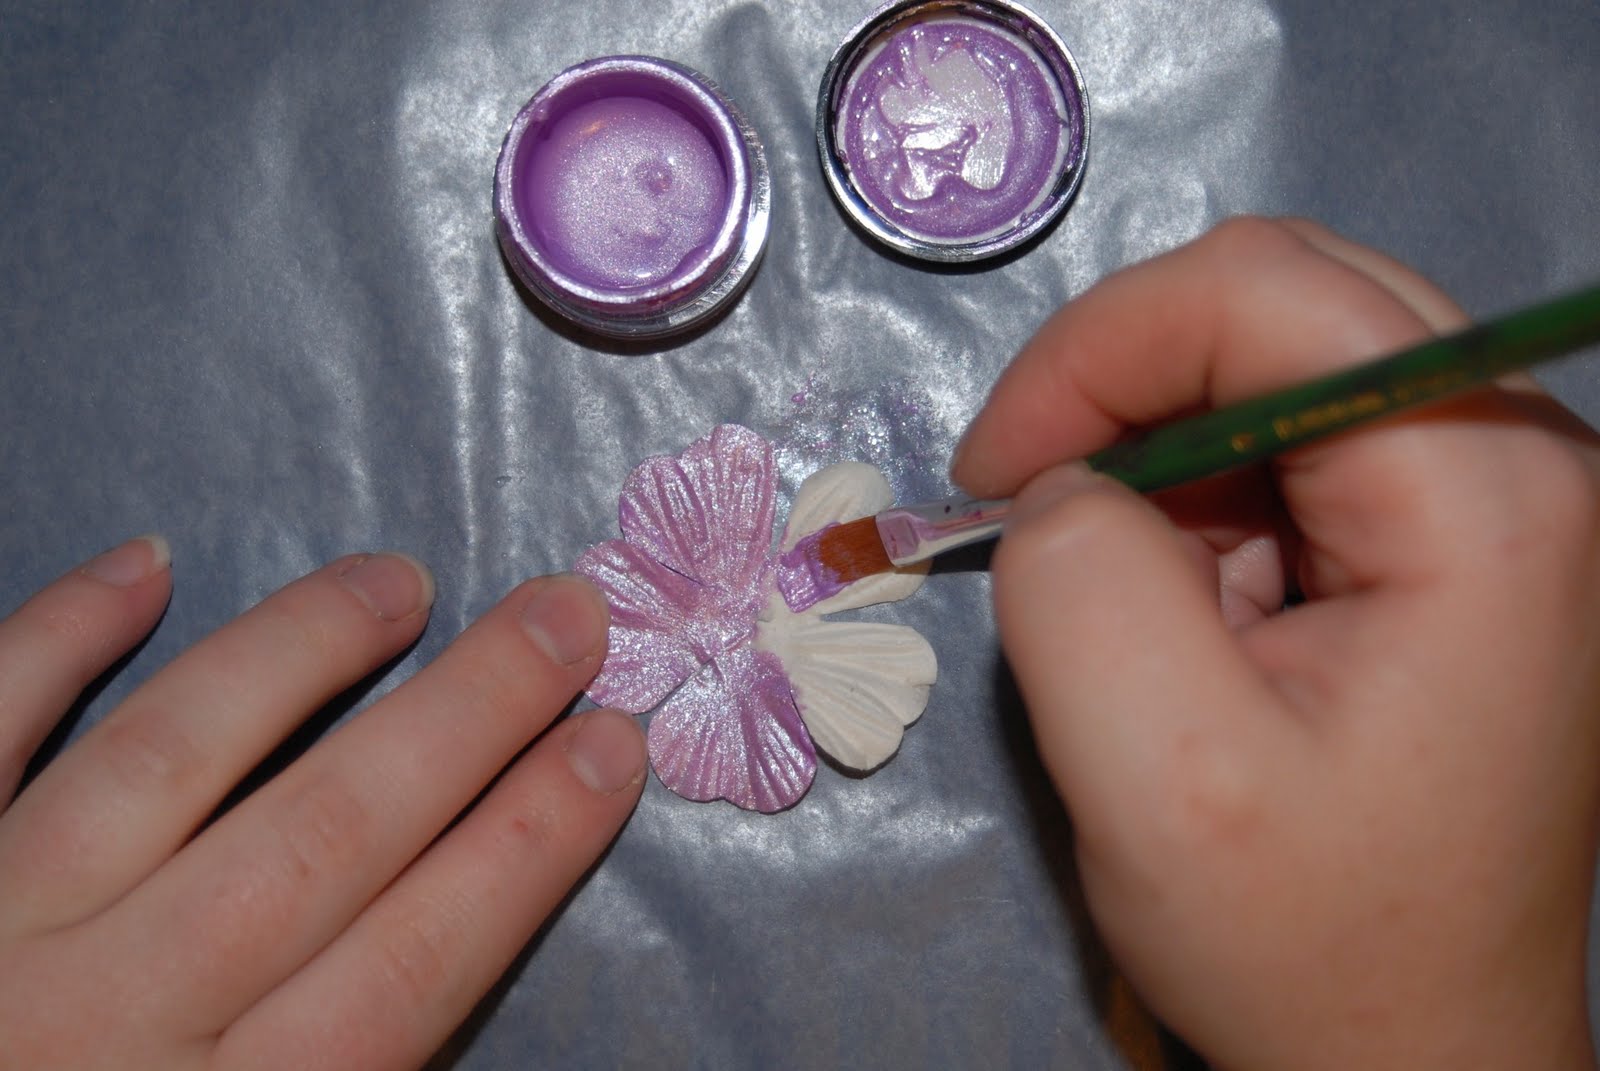
Here I have painted a paper flower with Amethyst. Just look at that great color and shine!
quick tip: don't mist your flower before painting... I know I tell you to mist a lot of things first, but not this time. You will loose the texture and depth of the flower if you get it too wet.

Now that you have the basics down, let's shake things up a bit...
Try just brushing the edges of your petals for a soft subtle look... Or, for a bolder look, Start your brush in the center and stroke outwards towards the ends of the petals letting the paint fade... *this one may take a little practice to get the feel for how much paint to use for a nice fade...*

Want to add more depth? Give this one a go...

Lightly rub a dye ink pad over the raised portions of your flower and around the edges.
quick tip: it is important you use a dye based ink for this because of the way it reacts to water.
Now, paint over your flower. The water based paints react with the dye ink.. Some of the dye will mix with the paint giving you a new color, and it will soften and feather the inked areas. Here I used Fairy Dust CI paint to get a nice tone-on-tone look when it blends with the ink.*I forgot to take a close up of this before using the flower... duh! But, a close up is coming!*

This time, instead of inking with an ink pad, I used a finger dauber to highlight the raised areas with a bold sparkly color... Buttercup
Here is a closer look at the last two techniques...

Are these paints only good at altering white flowers? Of course not!!!
Here is a look at several different paints used on the same color of flower to give you an idea of how they alter the look....
In the top row, the middle one is what they all started out looking like. On the left, I used Tutu Pink. On the right, Tanzanite.
On the bottom row... the one on the left is Autumn Wheat, the one on the right is Fairy Dust

Here is something I love to make with these flowers for my niece... ok, I wear them too... hey, they're cute!

Hair clips
Simply paint your flowers then embellish. Finish it off by hot gluing to an alligator clip.
Ok, now, for what you have all been waiting for... How can you win 5 jars of this fabulous paint?

Step 1, become a follower of this blog (if you are already a follower, great!)
Step 2, leave me a comment telling me what your favorite CI paint color is. (if you don't know what colors there are, click here to find out!)

It's that easy! You have until Noon (MST) Monday, July 5 to enter. I'll be back later on Monday with the randomly chosen winner.
Have a sparkly weekend!
Kassi

I think it is time for another paint give away!!!

What do you think???  Stay tuned for the details!

Thursday, June 17, 2010

shimmery beach dreamin'

hi everyone!

late as usual :P i gave the DT girls a color challenge this time around. i asked them to use beach-y colors - *blues*yellows*sand* and as usual the girls for team A did an outstanding job! click on the name to go to their blog and get more details!

Ashley

Clare
Kendra
Shelley
we will be back with more beach dreamin' next week from team b!
hugs
Marti


Monday, June 14, 2010

glimmer in the mist

Hello all! It's Kassi, here once again to inspire you with another fabulous way to use the Creative Inspirations Paint!

Well, most schools are now out for summer, so in celebration of this, I thought this week, we should get wet! Who doesn't like a nice cool mist on a hot day? Well, let's add some color and bling to it, and we have art in the making!

CI Paint Glimmer Mist

Here's what you need:

Creative Inspirations Paint of your choice
A mister
A craft stick (not shown)
Water

The mister I am using is made by Ranger, however I have heard that some squirt bottles you can pick up at dollar stores work as well. I have never tried.
Step 1: Fill mister part way with water.
Step 2: Shake paint jar well. (remember this is what keeps your paint evenly sparkled!)

Step 3: Using a craft stick, scoop some paint out of the jar and put it in the mister.

please note: this is NOT an exact science (at least not the way I do it!!!). Experiment with your ratio of water to paint to find what you like. The less paint, the lighter your color, the more paint, the darker your color. You will have glimmer either way.

Step 4: Using a permanent marker, label the lid of your mister so you know what color it is. This step is optional, but I have found it very useful!
Step 5: Shake mister well each time you use! In the misters, not only do the sparkles sink to the bottom, but some of the colors separate. This is fine!!! Just shake it up, and you are good to go.

Step 6: Ready.... Aim.... Spray!
Just like other misting products, you can very the look by how close/far you spray from, and how fast you sweep your hand across the page. A fast sweep from a distance will give you a fine mist. Closer up, you will get a thicker mist, and potential splotches (which some people don't like, but I think they add character!). If you don't sweep your hand while spraying, you will get a pool of color (similar to the one shown above). Play around with it to see what look you like.

*another quick tip: do a test spray on a scratch paper before you spray on your project each time you get your mister out. this way there are no surprises if your nozzle is partially/fully clogged. If it is clogged, I use hot water, some shaking, and a little pounding and I can usually get it going again*

So, now you know how to make them, what can you do with the sprays? Well, you can color paper, flowers, fabric, ribbon, etc. all with a sweep of your hand. You can also use them with masks as shown in the sample project below. For my mask, I cut an image out of acetate with my Cricut. I then covered the back with a repositionable adhesive. I then placed the mask on the page and sprayed. I then took a rag and gently dabbed off some of the extra spray. This gives it a smoother look. When you remove your mask, you will have a fun, shimmery design!

I know it is kind of hard to see in the picture, but IRL there is more of a difference between the white and pink.
The flower and ribbon were painted with Garnet CI Paint. The mist was also make with Garnet. The lighter shade comes from less paint & more water. I wanted to show that even if you go light on the paint, you still get great shimmer!
Here is a close up of the flower. The leaves were done in Sage CI paint.
Well, I hope that this has got you thinking of fun and creative ways to use your Creative Inspirations Paint! Until next time, stay sparkly!

Remember to stop by on Thursday. The DT has some great stuff to share!

Kassi

Thursday, June 10, 2010

another clearly sparkling thursday!

good morning everyone! today we have the clear projects from Team B - such a great bunch of creative peeps i have the pleasure of working with!


as always - click on the person's name to go to their blog for more deets!

Kassi


Denise (yes - that's a giant ostrich...)


Alison

Stephanie


have a great day all!!!

Monday, June 7, 2010

Tied up in Sparkles

Hello all you sparkly and creative people! My name is Kassi, and I am a member of the Creative Inspirations DT. There have been a lot of questions of what you can do with these cute little jars of complete yumminess. The answer: TONS!
Today I thought I would share one of my favorite uses.
Ribbon.
I love using ribbon on my projects. Like most people who love ribbon, I have tons of the stuff, but I would get so frustrated with the fact that despite all the ribbon I have, I never seemed to have the "right" color. To fix that problem, I use these CI paint to alter cheap white ribbon (you know, the kind you can get for 50 cents a spool).

I usually do this on a non-stick craft mat, to make cleanup a cinch, but for the sake of easy viewing in photo graphs, I am using some dark paper behind my ribbon.
I tape the ends of my ribbon down to my work surface. This allows me the use of both of my hands and keeps the ribbon in place.

Next, I lightly spritz the ribbon with water. *this step is not necessary, however, because the paints are water based, they mix well with water, and spritzing the ribbon just keeps the ribbon from absorbing quite as much paint*

Shake your jar of paint (this insures the sparkles are well mixed into the paint as they tend to settle). Open the jar, and simply brush on your paint, and allow to dry. This is quick & simple and now you have a sparkly ribbon that matches perfectly with with your project! The hardest part (at least for me) is waiting for it to dry =)
Even on ribbon, this paint shines! Check out that shimmer. It is so hard to get a good photo of the paint, is so much better IRL.
Here is a sample project using painted ribbon.
Here is a closer look at the painted ribbon on this project. Isn't that gorgeous???
So, next time your ribbon doesn't match, grab a jar of CI paint and make it match!
Have a fabulously sparkly week!
Remember to check back on Thursday to see more creative projects from the DT!

Thursday, June 3, 2010

we are clearly sparkling today!!

hi everyone!!!
i am having a way late day today so i apologize!! i challenged the DT girls to use their fabby shimmering Inspiration Paints on something clear - acetate, acrylic, shrinky dinks, etc. and as usual they are ALL incredible!!!

click the name above each project to go to the blog for more details!


Clare

Marti

Ashley
Shelley

Kendra
i tell ya aren't these girls just AMAZING!!! we will be back next week to see what Team B whipped up for you!
have a fantastic weekend!