Inspirations

Inspirations
The color you see is the color you get!

Monday, June 24, 2013

"Oh Beautiful for Spacious Skies..."

Hello Creative Inspirations Paint fans! Since the 4th of July is coming up and here on the blog Diana has the awesome Inspired By Challenge: Red, White and Blue going on, I thought I would do a little Red White and Blue project of my own. 
Really, in this case it was take an old project and make it better. Last year did this mixed media piece using lyrics from "America, the Beautiful" and a fabric US Flag I made using acrylic paints and a piece of muslim. There was also some stamps, stickers and various patterned papers incorporated in the piece. I loved how it turned out, but never felt as though it was complete. I recently realized what I could do to finish the piece off. 


Using some patterned paper I covered a wooden heart I had and then used Rustic Red and Denium around the edges of the papers and on the side of the heart. I took chipboard stars and used Deliquesce Fine White to cover them and adhered them to the heart. I took four additional chipboard stars, embossed them and added them to the corners of the canvas. The USA on the heart was made using some letter alphas which I embossed with Deliquesce Super Sparkle Red. It has a great sparkle!! 


A close up of the added decorative heart. To give the stars on the entire piece more sparkle, I added Fairy Dust paint to each of the stars. To the four stars on the canvas, I also added a bit of Denium paint to the edges of each to help them blend into the original canvas. It helped pull the heart together with the canvas. 

And the products from CI Paints used below: 


You still have one week to join in the Inspired By Challenge: Red, White and Blue... come play! 

Have a great day!! 


Sunday, June 23, 2013

Inspired by:Red, White and Blue-- week #2


Just a reminder this is week #2 of the Inspired by challenge:
 ---------------------------------------------

This week's challenge is:
Inspired By: Red, white, and Blue
Here's some inspiration:
Hi DIANA L. here from DL.ART

I did a quick sketch and then painted the flag  using


creative inspiration paints in Royal blue, garnet and
winter frost. The flag pole was painted using gold for the finial and tan for the bottom portion


I used dots to represent  the stars


I love how this paint shimmers

I hope you have enjoyed my project and will play along with this week's challenge!!
Remember you do not need to use CI Paints on your projects but if you have them we would LOVE to see how you used them!!
As always thanks for stopping by and
have a great week!
For more information on the flag card please visit my blog at DL.ART
Have a blessed day, Diana

---------------------------------------
General Challenge Rules

Each week you will be given a challenge to find inspiration in/from what ever the challenge theme is... you can be as literal or abstract in your inspiration as you want....Just make sure you can tie it back to the theme! Challenge closes at 6:00pm Eastern on Saturday.
You will always be able to jump back to the current challenge by clicking the "Current Challenge" link in our sidebar. The rules can always be found by clicking the tab "Challenge Rules" at the top of the page.
You do not need to use the Creative Inspirations Paints in your project, however, if you do, tell us which colors you used, and your name will go in the drawing twice! Each month, one person will win 5 jars of paint in the colors of their choice. The winner will be randomly drawn from all the people who have played that month, so make sure to join in on our challenges each week!
---------------------------------------------

Saturday, June 22, 2013

a dangerous pastime...

"LeFou, I'm afraid I've been thinking"
"A dangerous pastime"
"I know."
"Now the wheels in my head have been turning... and right now I'm evolving a plan!"

~Beauty and the Beast
(yes, I am singing the song out loud, and yes, it is stuck in my head. LOL!)

It's summer, and I have been thinking... thinking that today I want to celebrate by sharing not just one, not even two,  but THREE tutorials with you!  How's that for fun!  Ready for a long & picture heavy post?

The first 2 are kinda similar in that they are both ways that you can 

MAKE YOUR OWN STAMPS!


Technique 1: Fun foam texture stamps

Die cut or hand cut cheap fun foam. You now have a stamp. LOL. That was easy!

Ok, so I won't leave you there!

Use your heat gun to warm the foam until the surface becomes slightly shiny. It may also begin to curl. 

Quickly press something with texture (like a rubber stamp, clay texturizing plate, embossing plate, stencil, wicker chair... anything with texture) into the hot foam and hold until the foam cools. It won't take long. Remove to foam, and you will see that it keeps the texture!

Don't like the texture?  Simply reheat and try again!

Like what you have?  Cover the back with a thin layer of a temporary adhesive like Aleene's Tack-it Over & Over.  

Once dry, you can stick it you an acrylic block and stamp your totally awesome texture! 

(Evergreen Creative Inspirations Paint) 

Store on a sheet of acetate or in a CD case. 


Technique 2: Cricut stamp sheets 
(don't worry if you don't have a Cricut, you don't need one to do this!)

This is a Cricut cuttable stamp sheet.

If you don't know what this stuff is, it is a flat sheet of a material similar to what your acrylic stamps are made of. It is made to be cut in the Cricut machine by Provo Craft, but it doesn't have to be. Although I have gotten some good results with the machine, it can be somewhat finicky just because of the nature of the material. You can get at Amazon  HERE, or check out your favorite shopping sites!

If you are good at free hand drawing, feel free to go for it! I'm going to stick with tracing! All you need is a regular ball point pen. It is really nice to draw on!

For my card today, I use a stencil I made with my Silhouette, and I wanted some stamps to match so, I'm going to use that same stencil to make my stamps!

If you are good with scissors, you can cut it out. However, for straight lines, I like to use a blade. I also like to put down something with a flat edge to guide my blade and keep the stamp material from shifting. I'm using a palette knife. 

Hand cutting this with scissors or a craft knife is super easy, and a great way to make custom stamps without a machine! 

Now, I have two stamps! And, depending on your design... you can actually end up with 4 stamps! The material is the same on both sides, so it doesn't matter which side you stamp with! So if you cut out a shape of a bird, it can face either direction with 1 stamp!!!! Super fabulous!!!

Now, simply stick it onto your acrylic block and get ready to stamp! 

You may notice that because the stamp surface is smooth, some inks tend to bead up leaving behind splotch images. Not good. However, it is somewhat fixable! 

Use a nail file to gently rough up the surface. Now, ink up the stamp in Ranger's Jet Black Archival Ink, and just let it sit for a little bit.... Weird, I know. (I have no idea why this works, but I learned this trick about conditioning stamps to hold dye inks from a class I took from Tim Holtz. He said he had tried it with other inks, but only the Jet Black Archival Ink works.)  After letting it sit on there for a minute or so, stamp it off, then wipe off the extra ink with a little water. Your stamp will be stained, but that is not a problem. (you can now see it better!)  Now try stamping it with dye ink. If it still isn't stamping well, try more filing. Unfortunately this material isn't the BEST for dye inks, like many clear stamps. They work great for paint though!  

 Happy stamping!

Now, on to 
Technique 3: Custom epoxy embellishments!

Remember how I said I made that honeycomb stencil with my Silhouette? Well, I cut my stencils out of acetate... and it left behind all these cute little clear hexagons... I couldn't just throw them away!

Start out with die cut (or hand cut) acetate shapes. Then stamp them with Staz-On or Archival ink. Let that dry. 

Now, add color... you can do this either with alcohol ink/markers, or, for more glitz, paint it up with Creative Inspirations Paint!

*If you color with alcohol based products you need to color on the reverse side you stamped on!

Not in the mood for clear?  You can make epoxy embellies with paper too! Simply cut out your shape, then coat the front with a layer of Mod Podge. After it has dried, flip it over and coat the back. Don't forget the edges!  This way the resin won't seep in and ruin the paper!

Start adding Creative Inspirations Resinesense to the center of your embellies. After you have a puddle, use the nozzle of the bottle to pull the resin towards the edges, letting the surface tension keep it on the cut out. Once you have pulled the resin to all the edges, you can continue adding drops to the center to get a domed effect. Don't over do it though, or your surface tension will brake, and you will end up with a mess!  If you want a big dome, I suggest doing it in layers!

*If you painted your embellie, you are going to want to flip your embellie over and add your resinesense to the unpainted side... this way the paint is BEHIND the stamped image instead of covering it.

**notice I moved my all my pieces onto a piece of clear plastic. This allows me to easily move all my embellies into my uv lamp while keeping them all flat, and without the risk of touching any of the edges of the pieces. I just slide the put the whole thing... clear plastic and all under the lamp.*

Put your embellies into the sun or uv lamp to cure... 

WOW!

Anyone still with me??????

LOL!

Well, if you are, a huge THANK YOU! for sticking around!  It's always nice when I'm not just talking to myself. :D

Here's my card using 2 of the 3 techniques I shared today.

You cans see how fabulously awesome the Resinesense epoxy embellishments turned out! Super fun! It gives that bit of dimension without being so bulky that it is tough to mail, and the shimmer of the CI paints underneath... yeah, BEAUTIFUL!

And the stamps.. absolutely perfect! I love stamping with CI paints... so much shimmery goodness!

Ok... enough of my gabbiness!

Enjoy!


Friday, June 21, 2013

Share the Song

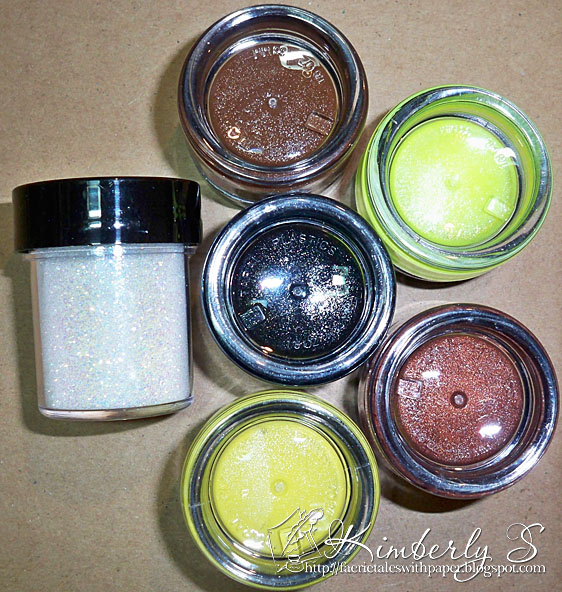
Hi CIP followers!  I have a layout from one of my art journals to share with you today.  I doodled the picture, glued her on, and then used some die cuts, along with a fabulous stamp of Music Notes (by Ann Vento/Raindrop Echo Designs at Whimsy Stamps).The paint colors I've used are Antique Copper, Bright Yellow, Canary, Chocolate, and Onyx.  I've also used the Resplendence Angel Dust glitter over the painted flower centers.  Each of these items can be found in the Creative Inspirations Paint store.  
Close up of one of the flowers:
Here is a closer look at the CIP products that I've used:
Don't forget to check out the current CIP challenge that Diana posts twice a month (with a mid-challenge reminder)!  Our current challenge is: Red, White, and Blue

Thanks so much for stopping by!

hugs
Kimberly

Thursday, June 20, 2013

Adventure

Hi and welcome summer! I hope everyone is enjoying time at home with the kiddos fortunately my kids are much older, but honestly I miss having little ones around to do crafts with.  Today I am sharing a tag I mad with corrugated cardboard.  I used my sizzix oval die to cut the shape.  Then I painted with my CI Paints.


I used a chipboard piece from Gina's Designs and other embellies.  I then fussy cut the face from a G45 paper set I had.   I also used gesso in certain areas for highlight.  

I hope everyone enjoyed today's post at CI Paints and dont forget to join in on the challenges and you could win some paint!


Wednesday, June 19, 2013

4th of July project using metal!

 
Hi, CIP Fans!
Today I'm sharing a 4th of July project for the Inspired by Red, White and Blue CIP challenge!
Did you know you can use the Creative Inspirations paint on metal!
Here's a fun way to brighten up some metal!
After I used Rustic Red and Denium I added Fairy Dust
 to the center of the star.
I then added the mini resin star in the center that I created with a mold
using the new product release Resinesence! 
It is a UV curing resin that is sold in a 2oz bottle!
After the star was cured I used Resplendence glitter in Angel Dust.
A close up is below!
 

                   Here's a close up of all the sparkle on the star!

 
 For another quick and fun project using the Resinesence!
I added the Resinesence to the paper clip and then I added
Resplendence glitter before it was cured!
I left the twine off the clip part so that the twine would not unravel when using the clip a few times!


If you would like to win some CI paints join us for the challenge!
Once you join in on the challenge your name will be entered in the drawing to win 5-CI paints!
Here's the link to the Inspired by Red, White and blue challenge!
Thank you for stopping by the CIP blog today!
Have a wonderful day!
Michelle
 

Tuesday, June 18, 2013

Springtime Strawberries


Hello everyone, Cheryl here with today's card for Creative Inspiration Paints using the beautiful shimmery paints on the Strawberries,vines, and frame.


I used CIP's Sage,winter Frost, and Rose quartz for my card today. I absolutely love how these paints shimmer. They really do add beauty to all your projects. 

1st I had colored then accented with the CIP's on my CottageCutz Strawberries & Vines. Next I thought it would be a good idea to paint the Postage frame where the stamped sentiment is, however I should have sponged it before adding my pieces. Next time I will do it a little different then I did this time around.
Creative Inspiration Paints Used:

My strawberries, Frames, and vines are all CottageCutz dies. All Ribbons are from RRR, and so are the buttons I used. The dp, is leftover from CTMH I think it came from one of their sales. I added some super small stitching to complete my card.


Thank you for looking and have a lovely day
Hugs to all,
Cheryl

Monday, June 17, 2013

Shimmery Butterfly

Hello sweet friends!

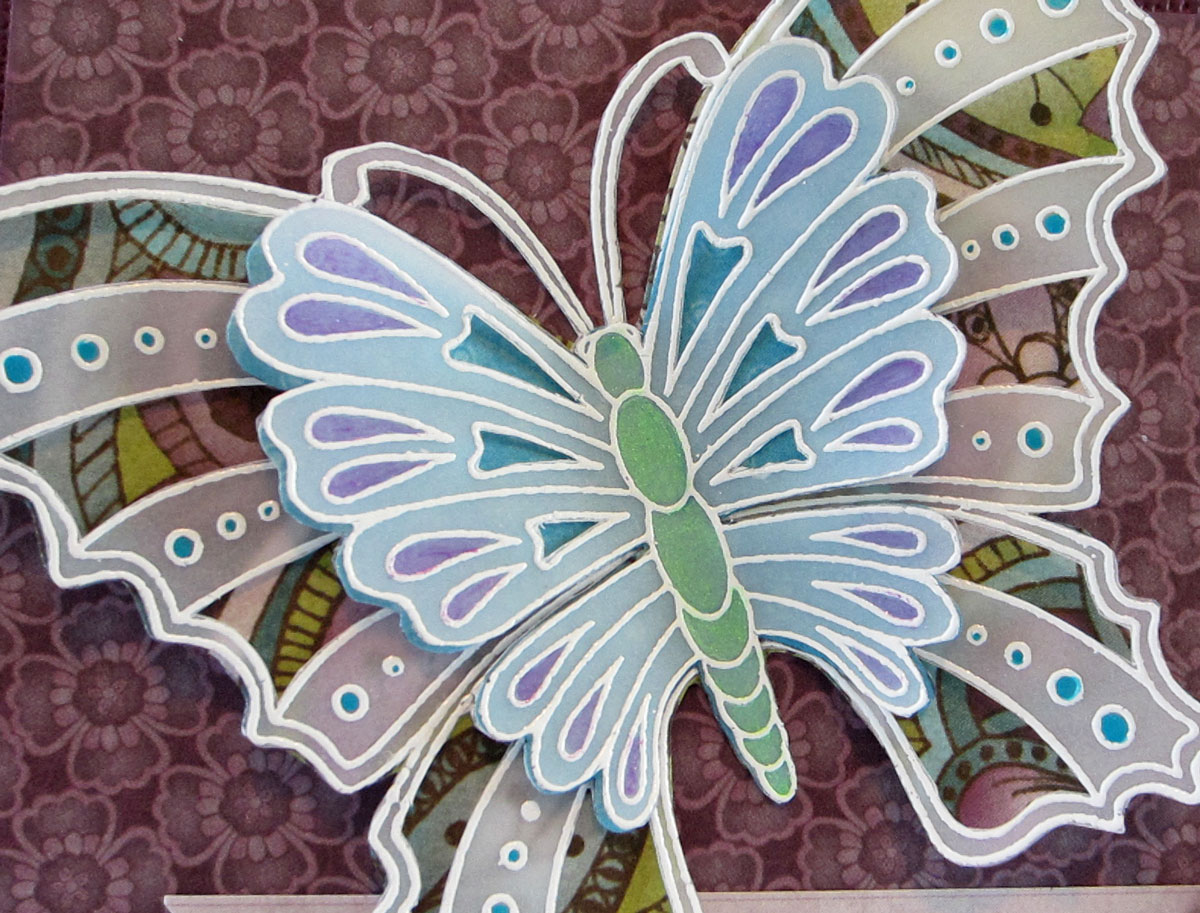
Kendra from Luv 2 Scrap here today to share a fun Butterfly card I recently made!

I used the Parchment Craft Technique to create the butterfly on this card.

I then fussy cut some of the sections, so you could see the paper underneath.
And as you probably have guessed by now....I used some of my shimmery paints in the other sections!!

On the butterfly, I used Mint, Turquoise and Lavender!

I also added a few die cut flowers and leaf flourish....
that I also added some shimmer to!  I used Light Purple on the the flowers and Green Olive on the leaf flourish!


Mint

Turquoise

Lavender

Light Purple

Green Olive


Have a wonderful day!!

Kendra

Sunday, June 16, 2013

Inspired by Red, White and Blue


Thanks to all those who joined in our "Father's day " challenge, 
we enjoyed all your wonderful creations!
 Check the post below to see the
  Random.org Top 3!
 ---------------------------------------------

This week's challenge is:
Inspired By: Red, white, and Blue
Here's some inspiration:
Hi DIANA L. here from DL.ART

I did a quick sketch and then painted the flag  using


creative inspiration paints in Royal blue, garnet and
winter frost. The flag pole was painted using gold for the finial and tan for the bottom portion


I used dots to represent  the stars


I love how this paint shimmers

I hope you have enjoyed my project and will play along with this week's challenge!!
Remember you do not need to use CI Paints on your projects but if you have them we would LOVE to see how you used them!!
As always thanks for stopping by and
have a great week!
For more information on the flag card please visit my blog at DL.ART
Have a blessed day, Diana

---------------------------------------
General Challenge Rules

Each week you will be given a challenge to find inspiration in/from what ever the challenge theme is... you can be as literal or abstract in your inspiration as you want....Just make sure you can tie it back to the theme! Challenge closes at 6:00pm Eastern on Saturday.
You will always be able to jump back to the current challenge by clicking the "Current Challenge" link in our sidebar. The rules can always be found by clicking the tab "Challenge Rules" at the top of the page.
You do not need to use the Creative Inspirations Paints in your project, however, if you do, tell us which colors you used, and your name will go in the drawing twice! Each month, one person will win 5 jars of paint in the colors of their choice. The winner will be randomly drawn from all the people who have played that month, so make sure to join in on our challenges each week!
---------------------------------------------