Hello!
Shea here with Glitter and Bonbons to show you my non-traditional Thanksgiving card. This seems to be the year for non-traditional colors as I've made some Christmas cards recently using different colors as well. I just find that sometimes I want to shake things up a bit. Besides, my garden really does have all of these colors in it in autumn!
How's that for some in-your-face color? I used spray inks on watercolor paper, and they never fail to wow me with their vivid shades. And they're perfect for complementing with a little glitz and shimmer. I die cut the leaf then painted it with four shades of CI Paints - Gold, Burnt Clay, Evergreen and Autumn Wheat.
After the paint had dried I misted the leaf with water and scrunched it up to distress it a bit, then placed it on a bit of ribbon netting. A greeting, some ribbon and a couple of small stick pins complete the arrangement.
I embossed the edges of the card and sentiment panel with Deliquesce Gilded Gold. I also sprinkled a little bit of it over the sentiment and heated it from underneath for a slightly different look.
Some gold leaf lines in opposing corners complete my non-traditional Thanksgiving card. Thank you for joining me and please pop over to the current CI Paints challenge Inspired By: Autumn Colors.
Happy crafting!
Tuesday, September 10, 2013
Shimmery Fall Leaf
Labels:
Autumn wheat,
Burnt Clay,
Evergreen,
gold,
Shea Marshall
Monday, September 9, 2013
Rainy Day Girl
I recently was at a local scrapbooking store that I will be teaching at this month, and the owner, Bridget gave me some fun goodies to play, including some great vintage images printed on transparency film. One of the sheets were these little girls, which I now call my rainy day girls. :)
CI Paints are perfect for coloring theimages. In order to color them, I flipped them over and colored the reverse side. After I colored the areas I wanted colored, I used a fixative to seal the colors on the transparency so they wouldn't smear when adhering or adding more color.
The umbrella was colored with Garnet and I used Canary on the girl's dress, after I first used a Faber-Castell Big Brush marker in yellow on it. The Canary added lighter highlights to the dress for a more realistic look.
The rest of the colors were either Faber-Castell Gelato's or Big Brush Pen's. The ribbon I chose was not as bright as I wanted, so I used more Canary paint on it. It pulled the yellow in the dress out more.
I felt like the red cardstock I used to frame the transparency and base of the card needed a little more, so I used some Garnet on the edges. The jewels are Siam Jeweled Inspirations. I am completely addicted to the Jeweled Inspirations... did you know they already have adhesive on the backs of them? All it takes is some added heat, which I do with my heat gun, and they are adhered! Just make sure to hold them down with something... I use a pencil, tweezers or handle of a paint brush.
![]() |
| Siam Jeweled Inspirations |
Be sure to join in the Inspired By: Autumn Colors challenge hosted by the fabulous Diana! We love to see all of your wonderful creations!
Have a great day!
Sunday, September 8, 2013
Inspired by: Autumn colors...
Thanks to all those who joined in our "Anything goes" challenge,
we enjoyed all your wonderful creations!
Check the post below to see the
Random.org Top 3! and our August monthly winner
---------------------------------------------
we enjoyed all your wonderful creations!
Check the post below to see the
Random.org Top 3! and our August monthly winner
---------------------------------------------
This week's challenge is:
Inspired By: Autumn colors
Hi Everyone, DIANA L. here from DL.ART with today's inspiration
challenge for you:
Hi Everyone, DIANA L. here from DL.ART with today's inspiration
challenge for you:
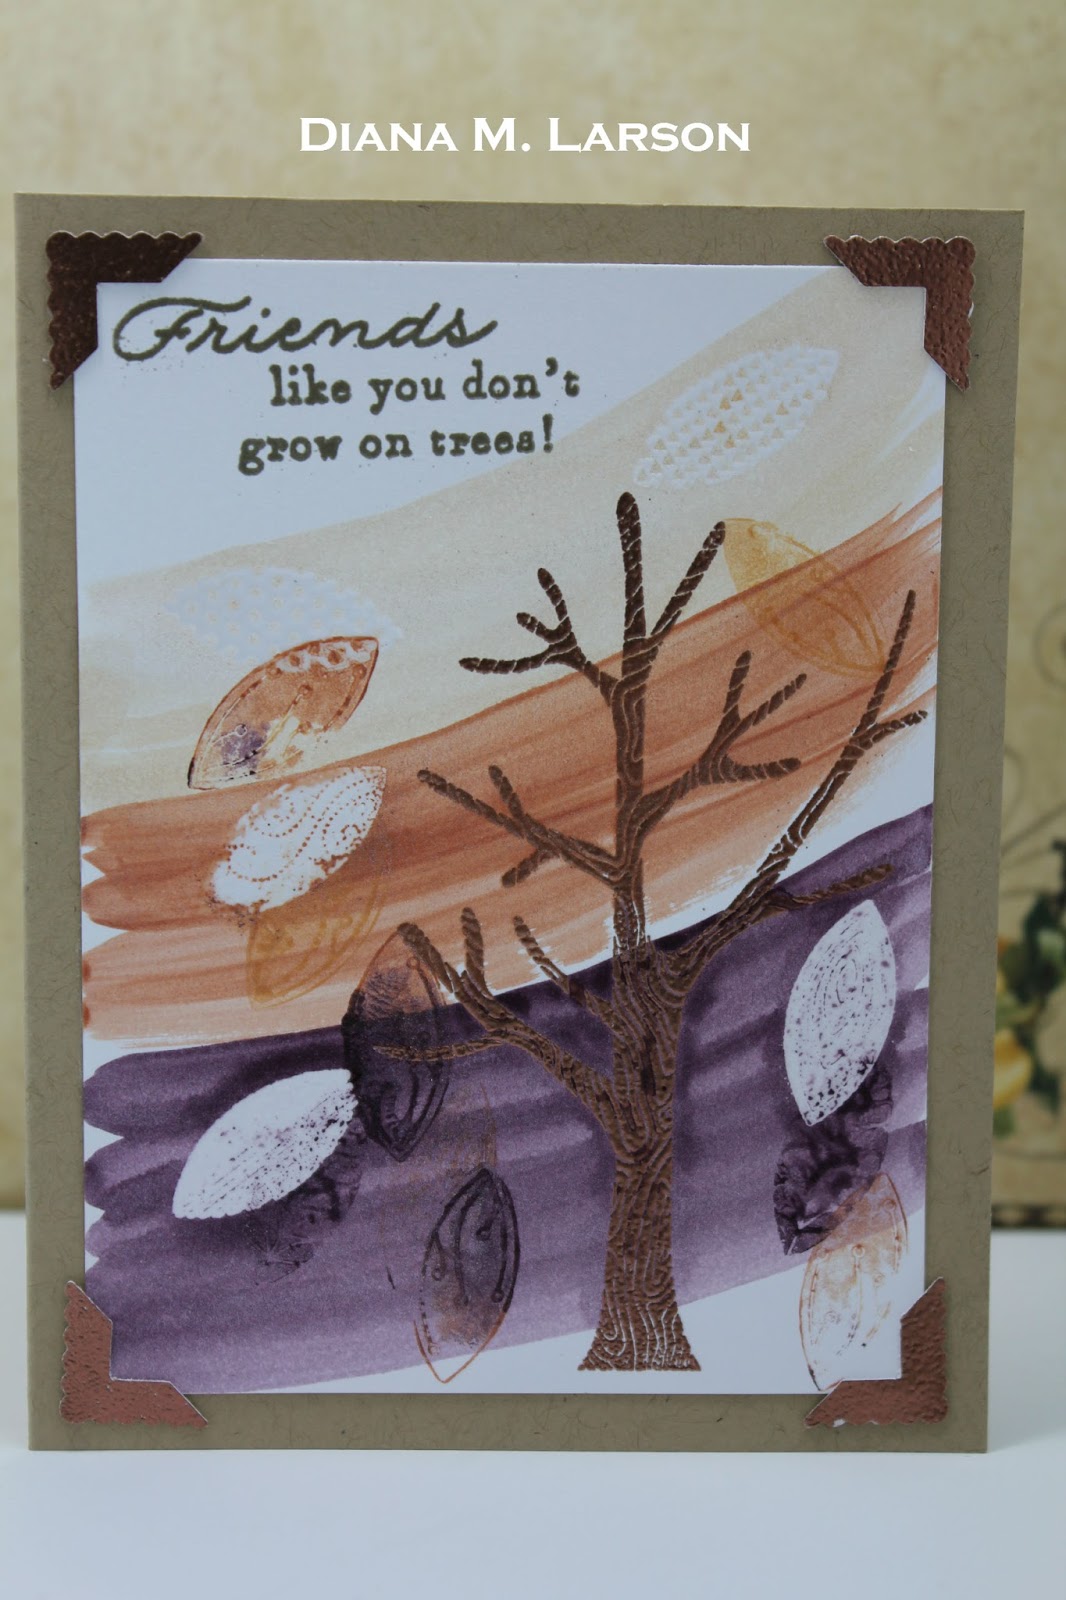
Here's some inspiration:
I used raw sienna, burnt sienna, and burgundy creative inspirations shimmering paints. I also used white, metallic copper and platinum Deliquesce. This was stamped and painted on white card stock then mounted on kraft card stock.
I hope you have enjoyed my project and will play along with this week's challenge!!
Remember you do not need to use CI Paints on your projects but if you have them we would LOVE to see how you used them!!
As always thanks for stopping by and
have a great week!
DIANA L.
for more information on my project come visit my blog at
http://dianamlarson.blogspot.com
---------------------------------------
General Challenge Rules
Each week you will be given a challenge to find inspiration in/from what ever the challenge theme is... you can be as literal or abstract in your inspiration as you want....Just make sure you can tie it back to the theme! Challenge closes at 6:00pm Eastern on Saturday.
You will always be able to jump back to the current challenge by clicking the "Current Challenge" link in our sidebar. The rules can always be found by clicking the tab "Challenge Rules" at the top of the page.
You do not need to use the Creative Inspirations Paints in your project, however, if you do, tell us which colors you used, and your name will go in the drawing twice! Each month, one person will win 5 jars of paint in the colors of their choice. The winner will be randomly drawn from all the people who have played that month, so make sure to join in on our challenges each week!
---------------------------------------------
Random top 3 and August monthly winner
Thanks to those who joined us last week for our
Inspired By: Anything goes!
Here are the Random.org Top 3:
You each will receive an extra entry in our June drawing for some CI Paints of your own!
You can grab this badge for your blog:
It is also our first challenge of the month so we have our monthly winner to announce
CI paints August winner is:
# 41 Pat
If you could send us an E-mail with your mailing address and the 5 colors you would like we will get your prize out to you
ci.shimmer. paint at g mail dot com
Friday, September 6, 2013
we need YOU!
Are you a Creative person?
Do you love Color and Shimmer?
Are you able to take clear, bright Pictures?
Can you turn projects in on Time?
Do you like to have Fun?
We may just be looking for YOU!
Hold on to your paintbrushes everyone-
CREATIVE INSPIRATIONS PAINTS
is looking for several people to join our Design Team!
October 2013- April 2014
Are you INTERESTED?
Before you jump in head first, here's some food for thought...
-It is a 6 month term. Oct- April.
-You will need to make at 2-3 projects a month along with write blog posts for them.
-You may be asked to do more projects during blog hops.
-You need to support your team by leaving blog love (comments) on their posts, as well as on the post of those who join in our challenges.
-You need to be dependable and punctual. Your posts need to go up on time!
-You need to be a team player. No drama behind the scenes here! We like to have fun! :)
Have I lost you? If not, let's talk about what you GET...
Let's start with the ENTIRE collection of Creative Inspirations Paints to work with!
Molly (the owner) is also VERY generous and sends other fabulous products.
NOW, if you are as EXCITED as we are about this,
Here's what you need to do-
Send an email to ci.shimmer.paint@gmail.com with "DT CALL you name" as the subject.
This email must contain:
1. Name & where you live (international welcome!)
2. Link to your blog as well as any other places you normally share your work (message boards, FB, Pinterest, etc)
3. List of Design teams you are currently on (no experience is needed, we just want to know)
4. A little about you... who you are, your art style, what types of projects you do most... You know, introduce us to you!
5. 2 photos of your favorite recent projects. (please do not send us more photos!)
6. Become a follower of our blog (if you aren't already) and 'like' our FB page (if you don't already)
You have until Midnight (PST) Sept 20, 2013
NO LATE ENTRIES WILL BE ACCEPTED.
We look forward to hearing from you!
~Kassi
Team Lead
AND, GO!
Labels:
design team
Thursday, September 5, 2013
Framed
Hi everyone Monica here. The holidays are fast approaching and today I am sharing a Christmas frame I made for a friend. I didnt add a photo because I want her to be able to add whatever picture she would like to it. I used CI Paints to paint the wood and you can just see all the shimmer and I painted the gold shasta flower as well.
I added a cute gingerbread stamp from Sweetstamps just to make it fun
Closeup of the flower the CI gold paint is absolutely stunning!
Wednesday, September 4, 2013
Back to School Resinesence Projects!
Happy Wednesday CIP Fans!
I wanted to create some fun back to school projects using the Resinesence!
For the tag I made the glittered apple from using a play dough mold.
The colors I used are the Resplendence glitter Emerald for the leaf and
Resplendence Regal Red for the apple.
I love the CIP glittters they really do have an amazing sparkle to them!
Here's some more colors you can see at this link too!
To add some more color I used Canary CI paint on the pencil top and the sun on the circle die cut.
A close up of the colors below!
A close up of the amazing sparkle from the Resplendence CIP glitter!
The CIP Resin Resinesence!
This resin is amazing it only takes 20 minutes on a sunny day at
80 to 90 outside to cure!!
The colors I used!
I altered a metal paper clip too using the Resinesence!
For the colors I used CI paint in Rustic Red and Emerald.
A closeup!
I hope you enjoyed the simple and quick Resinesence projects!
Our anything Goes challenge ends this Saturday at 6pm EST!
If you join in on the challenge your name will be added to a drawing for a chance to win 5 CIP paints!
Thank you for visiting the CIP blog today!
Have a wonderful Wednesday!
Michelle
Tuesday, September 3, 2013
Shimmery Tilda!
Hello everyone and Happy Tuesday to all!
Today I'm sharing a card I designed for Creative Inspiration Paints using the beautiful shimmery paints on the flowers,leaves, tilda,and the stars.
I tried to get some different photo's to show the shimmer, its hard to do some times in photo's, but in person its easy to see. On Tilda's dress I used the Blue ice. for the stars & yellow flowers I used Mellow Yellow , for the red roses I used Rose Quartz,
Tilda was first colored with copics, then layerd all the flowers and then painted them. I think it was easy to paint them once they were on my card. The greenery was painted also using the blue ice paint. Love the color and shimmer it made all the die cut pieces.
I made my bow using diamond satin ribbon from RRR!
thank you for looking and have a lovely day!'
hugs ,
Cheryl
Sunday, September 1, 2013
Inspired by : Anything goes Week #2
Just a reminder
---------------------------------------------
This is week #2 challenge :
Inspired By: Anything Goes
Hi Everyone, DIANA L. here from DL.ART with today's inspiration
challenge for you:
Hi Everyone, DIANA L. here from DL.ART with today's inspiration
challenge for you:
Here's some inspiration:
This can either be worn as a necklace or a pendant
I love how it came out I hope you will give it a try. It is easy and fun
I used creative inspirations resinesence and gold sparkle deliquesce and other items.
I used red colored alchol ink to change the color.
Don't you think everyone likes hearts?
This can either be worn as a necklace or a pendant
I love how it came out I hope you will give it a try. It is easy and fun
I used creative inspirations resinesence and gold sparkle deliquesce and other items.
I used red colored alchol ink to change the color.
I hope you have enjoyed my project and will play along with this week's challenge!!
Remember you do not need to use CI Paints on your projects but if you have them we would LOVE to see how you used them!!
As always thanks for stopping by and
have a great week!
DIANA L.
for more information on my project come visit my blog at
http://dianamlarson.blogspot.com
---------------------------------------
General Challenge Rules
Each week you will be given a challenge to find inspiration in/from what ever the challenge theme is... you can be as literal or abstract in your inspiration as you want....Just make sure you can tie it back to the theme! Challenge closes at 6:00pm Eastern on Saturday.
You will always be able to jump back to the current challenge by clicking the "Current Challenge" link in our sidebar. The rules can always be found by clicking the tab "Challenge Rules" at the top of the page.
You do not need to use the Creative Inspirations Paints in your project, however, if you do, tell us which colors you used, and your name will go in the drawing twice! Each month, one person will win 5 jars of paint in the colors of their choice. The winner will be randomly drawn from all the people who have played that month, so make sure to join in on our challenges each week!
---------------------------------------------
Saturday, August 31, 2013
charming shells...
Hello my fabulous friends!
For those of you who visit my personal blog, this is not new, but I wanted to share it here for all of my CI fans who want to hold on to every last bit of summer they can!
While we were at the beach, I made sure to pick up some teeny tiny shells for the "just in case", and this just happened to fit the bill! A custom charm to remember a fun filled day!
I started out with one of Tim Holtz charms.
I die cut a circle out of white cardstock as my base and used Glossy Accents to glue it to the inside of the charm. I then covered that with some more GA and sprinkled on some beach sand.
After that had dried, I glued on my cute little shells with more GA and let that dry.
I then covered it with Creative Inspirations Resinesense, and put it under my UV light for 30 minutes to cure.
Since the one shell was so tall, I ended up doing a second layer of Resinesense. When covering a charm with resin, it is better to build layers than to do one thick layer.
Normally when you work with resins, bubbles are considered a bad thing... however, with this particular piece, I thought the bubbles added to it, so I didn't discourage them. I think it adds character :)
Enjoy!
Supplies Used
Paper: Bazzill, My Minds Eye, card stock
Ink: Distress ink, Memento, Sharpie
Stamps: Unity "Vintage Handwritten", "Tiny Vintage Banners" & "Love in Return"
Silhouette: Honeycomb Background
Die: Quickutz "Nesting Circles"
Creative Inspirations Paint: Resinesense
Other: Basic Grey Alpha Stickers, Tim Holtz charm, sand, shells, brads, string
Labels:
resinescence,
tutorial
Wednesday, August 28, 2013
Chipboard & Mixed Media Canvas
Happy Thursday CIP Fans!
Michelle here with a extra blog post for today!
For the background of the canvas I used blue distress ink,
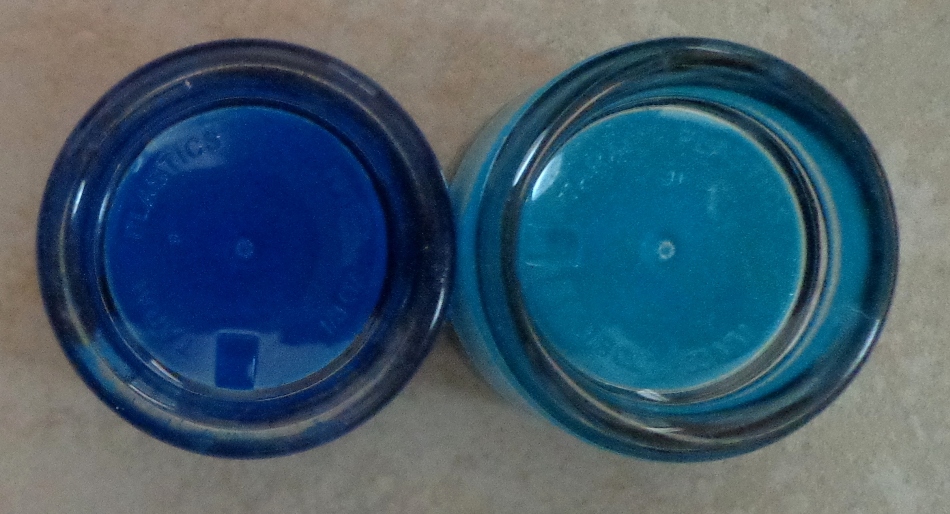
Creative Inspirations Paint for the drip I used Turquoise, and splattered dark blue paint in Sapphire!
Colors are below!
For the inking using a stamp, I used Faber-Castell big brush pen in black and Pitt artist pen for the center of the stamp.
For the Love chipboard word this is by A2Z and I used CI paint in Sunshine.
To add the stencilet by A2Z I used a Gloss heavy gel medium to the canvas.
Once it was dry I added a little distress ink lightly, randomly just to add a touch of color!
For the inking using a stamp, I used Faber-Castell big brush pen in black and Pitt artist pen for the center of the stamp.
The wooden buttons are by American Crafts.
Here are the amazing CIP colors I used!
Thank you for visiting the CIP blog today!
Have a blessed day!
Subscribe to:
Posts (Atom)