Inspirations

Inspirations
The color you see is the color you get!

Sunday, September 22, 2013

Inspired by: Anything goes


Thanks to all those who joined in our "Autumn colors" challenge, 
we enjoyed all your wonderful creations!
 Check the post below to see the
  Random.org Top 3!
 ---------------------------------------------

This week's challenge is:
Inspired By: Anything Goes

Hi  Everyone, DIANA L. here from DL.ART  with today's inspiration 
challenge for you:


Here's some inspiration:


I hope you have enjoyed my project and will play along with this week's challenge!!
Remember you do not need to use CI Paints on your projects but if you have them we would LOVE to see how you used them!!
As always thanks for stopping by and
have a great week!

DIANA L.
for more information on my project come visit my blog at
http://dianamlarson.blogspot.com

---------------------------------------
General Challenge Rules

Each week you will be given a challenge to find inspiration in/from what ever the challenge theme is... you can be as literal or abstract in your inspiration as you want....Just make sure you can tie it back to the theme! Challenge closes at 6:00pm Eastern on Saturday.
You will always be able to jump back to the current challenge by clicking the "Current Challenge" link in our sidebar. The rules can always be found by clicking the tab "Challenge Rules" at the top of the page.
You do not need to use the Creative Inspirations Paints in your project, however, if you do, tell us which colors you used, and your name will go in the drawing twice! Each month, one person will win 5 jars of paint in the colors of their choice. The winner will be randomly drawn from all the people who have played that month, so make sure to join in on our challenges each week!
---------------------------------------------

Random Top 3: Autumn colors


Thanks to those who joined us last week for our
 Inspired By:  Autumn colors  challenge! 
Here are the Random.org Top 3:

#119 Sammi


 #88 Damarius


 #104 Missy


  Beautiful work ladies!
You each will receive an extra entry in our August drawing for some CI Paints of your own!
You can grab this badge for your blog:

Saturday, September 21, 2013

Inspired By: Happy Halloween - Halloween ATC


Hi CIP fans! Dana here today sharing an ATC. I used some of my favorite "scary" stamps on a piece of cream colored cardstock. I applied Raw Sienna, Tan, Evergreen and Rose Quartz CI paint to my stamp block, spritzed it with water and then pressed the color onto my stamped image for a subtle watercolor-like finish that really sparkles.


Thanks for stopping by today!

~Dana

Wednesday, September 18, 2013

Mixed Media Paper Mache Apple!


                                             Happy Wednesday!!
            Here's another Fall project for the Inspired by: Autumn colors challenge!
           You still have time to enter this because it doesn't end until Saturday at EST 6pm!
            I altered a apple paper mache gift box I bought from the craft store.
            First thing I did was add some glossy medium to the stem,
            leaf and on the edges.
            I drew in the lines for the stem, and used a stamp for the leaf, and
            the checkered designs.
            Once that was dried I added the chevron stripes using modeling paste.
             I then painted the entire apple and used Rustic Red and for the
             chevron stripes I used Garnet. I then added a dot stamp with some
             more Rustic Red on the apple. For the stem I used Chocolate CI paint
             and Evergreen for the leaf. I also used some of the Chocolate CI paint
            over the checkered stamp area. I used  Faber Castell big brush pen
            to doodle near the top of the apple and to darken some
            on the checkered stamp area.
            To finish the apple I added some ink with the checkered stamp, some
            beads for some more texture, berries and some raffia.
            A close up is below!


 Here's a close up and I took this picture inside because it was so windy outside.
 I love all the sparkle on this apple!


                                   The amazing CI paints colors!


Thank you for visiting the CIP blog today!
Have a blessed Wednesday!

Tuesday, September 17, 2013

Golden Christmas Wishes


Hello everyone, Cheryl here with 2 Christmas Wishes cards for today. On both my cards I used my FAVORITE embossing powder from Creative Inspiration Paints, its the Deliquesce Gold Crystal Sparkle. I used it for the Stocking and for the sentiment tag on this card. On my next card I used it for the top of the stocking.


Love the look the Gold Crystal gives to my CottageCutz dies. The die I used here is the CottageCutz Build a stocking! Its sooo elegant and beautiful in person. LOVE IT!!!!
 All ribbon is from RRR.


Thank you for looking and have a lovely day!


Hugs to all,
Cheryl

Sunday, September 15, 2013

Reminder Inspired by: Autumn colors


This is  week  #2 of
Inspired By: Autumn colors

Hi  Everyone, DIANA L. here from DL.ART  with today's inspiration 
challenge for you:


Here's some inspiration:


I used raw sienna, burnt sienna, and burgundy creative inspirations shimmering paints.  I also used white, metallic copper and platinum Deliquesce. This was stamped and painted on white card stock then  mounted on kraft card stock.


I hope you have enjoyed my project and will play along with this week's challenge!!
Remember you do not need to use CI Paints on your projects but if you have them we would LOVE to see how you used them!!
As always thanks for stopping by and
have a great week!

DIANA L.
for more information on my project come visit my blog at
http://dianamlarson.blogspot.com

---------------------------------------
General Challenge Rules

Each week you will be given a challenge to find inspiration in/from what ever the challenge theme is... you can be as literal or abstract in your inspiration as you want....Just make sure you can tie it back to the theme! Challenge closes at 6:00pm Eastern on Saturday.
You will always be able to jump back to the current challenge by clicking the "Current Challenge" link in our sidebar. The rules can always be found by clicking the tab "Challenge Rules" at the top of the page.
You do not need to use the Creative Inspirations Paints in your project, however, if you do, tell us which colors you used, and your name will go in the drawing twice! Each month, one person will win 5 jars of paint in the colors of their choice. The winner will be randomly drawn from all the people who have played that month, so make sure to join in on our challenges each week!
---------------------------------------------

Saturday, September 14, 2013

wrapped in burlap...

Hello my wonderful and creative friends! 

Burlap is quite the trend right now in home decor.. have you noticed that? I'm not complaining. I really like it actually. 

One of the best parts is that it is inexpensive, and very DYI!
  
Ready to try your hand?

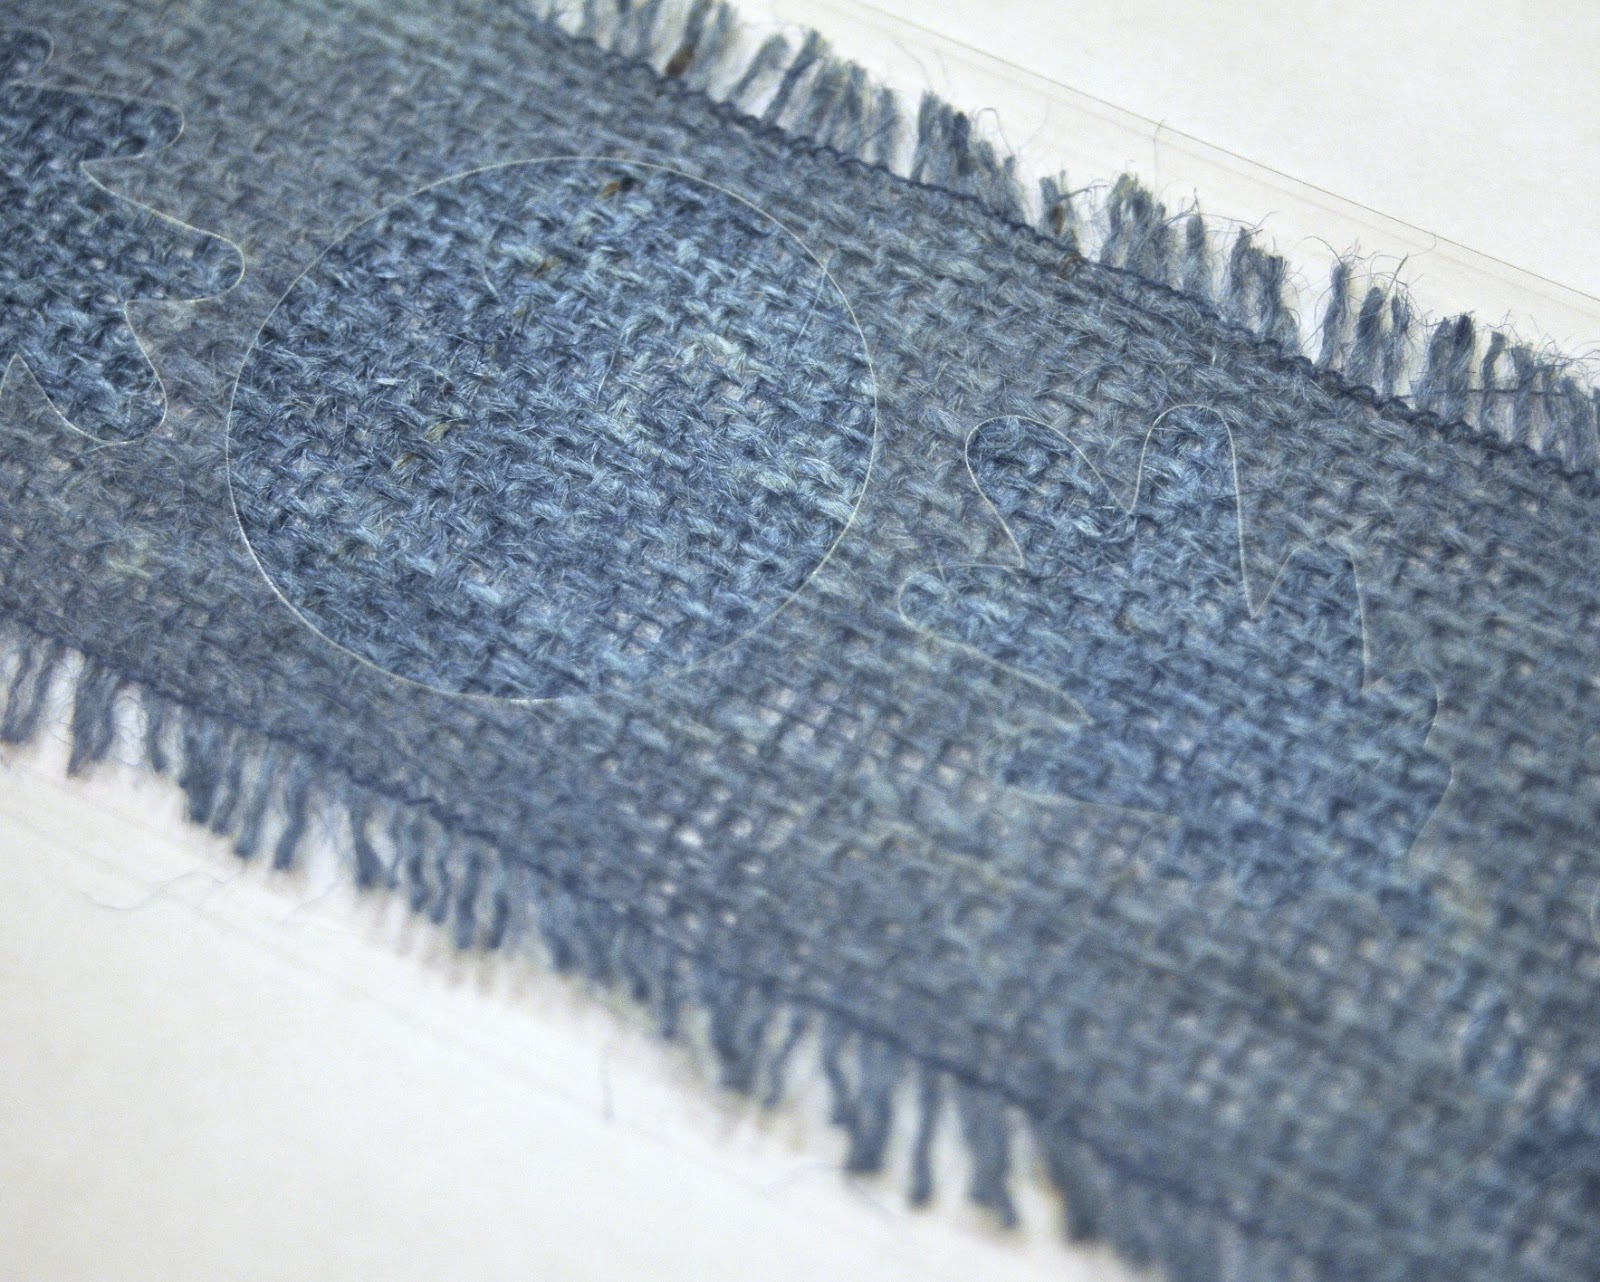
Step 1: Cut your burlap to the size you want it, both in width and length. If you want frayed edges, pull a few of the strings out along both the top and bottom edges.

Step 2: (optional) To keep the burlap from fraying farther, run it through your sewing machine with a small zigzag stitch. Since we are just wrapping a candle, it really isn't overly necessary, but if you want to be on the safe side, that's how you do it. 
(thanks mom! She's the sewer, not me! LOL)

Step 3: If your burlap is not the color you want, go ahead and change the color by spraying it with ink. I use All Purpose Ink by Tsukineko because if you heat set it, it is permanent in fabric. 

Step 4: Lay a stencil over your burlap. I cut mine out of acetate using my silhouette.  Keep the shapes fairly simple. Burlap has a fairly large weave. Any detail too fine will get lost in the weave.

Step 5: Sponge on some white acrylic paint. This will give you a base coat to paint over since the background is dark. If I had left my burlap white, I could skip this step.

Step 6: Sponge on some Creative Inspirations Paint. I'm using Gold. I thought it fit well for the season. 
I could have used many different tools to sponge on the paint. I chose to use a cotton ball because I like the distressed look not all the acrylic paint getting covered up. Personal preference for this project. Feel free to experiment with how you like to apply your paint, and how much paint you apply. I tend to go light, again because I like the white to show through and accentuate the weave of the fabric.


Step 7: Now it's time to personalize...

Try stamping... Simply load up you stamp with Creative Inspirations Paint using a makeup wedge...

...and stamp onto your painted burlap.

You can also use a paintbrush to doodle...

Whatever makes your heart sing. :)


Step 8: Once it is all finished and dry, wrap it around your candle, and use a needle and thread to sew the back shut. 

Here's a closeup of mine. I wrapped some heavy twine around it

 An acetate leaf colored with alcohol inks strung on the knot, and it is done! From start to finish this project really didn't take much time at all. It could be a fun gift... or a great project for the kiddos to help with. :)

Enjoy!

PS:  Don't forget the Creative Inspirations Design Team Call!  There is still time to get your application in.. and let's face it, the application requirements this time are EASY! No new projects required. So there really isn't any reason to put it off. :)  Here's the link to the info>>>DT CALL

Thursday, September 12, 2013

Shimmery Fall Tags!

                                      Happy Friday CIP Fans!
                        Today I'm sharing a extra post for September!
  Do you ever need a quick tag and have none in your home and you need to make a quick tag fast?!
  I have 2 quick tags that I created for the Inspired By: Autumn Colors for this weeks challenge! 
For the tag on the bag I used a stencil with glossy medium with beads, and then
 I added the Burnt clay and Burnt Sienna CI paint colors.
 The canvas tag I used a chipboard leaf as a mask using some glimmer mist.
 The CI paint color I used Burnt Clay.
As you can see both of these colors are similar in colors however the Burnt Clay
 is actually darker which is the darker color you see on the chipboard tag on the bag.
I love both if these colors and could not decide which one I wanted to use so then
 I decided to use them both. Both of these tags took me about 20 minutes to make once the paint or glossy beads medium was dried. I hope I have inspired you to create some fun and quick tags for Fall this year!
Close up of colors are below.


                               A close up of the glossy medium with beads and CIP colors!


                                      Burnt Clay CIP on canvas!

                                  A close up of the Burnt Clay on canvas


                                The amazing colors!


If you would like a chance to win some CI paint the Inspired By: Autumn Colors
for this weeks challenge doesn't end until 6pm EST on Saturday Sept. 21st.!
When you join in on the challenge your name will be entered into a drawing
for a chance to win  5 CI paints!
Thank you for visiting the CIP blog today!
Have a wonderful weekend!
Michelle

Something Special Girly Birthday

Hi CIP friends!  I have a girly Birthday Card for you today.  The products are used around the image, and on the pink branch.  (Ivory and Fuschia).  Each of these items can be found in the Creative Inspirations Paint store.  (image used is Something Special Just for you by Heather Ellis)
CI Products Used:

Don't forget to check out the current CIP challenge that Diana posts twice a month (with a mid-challenge reminder)!  Our current challenge is:

Thanks so much for stopping by!

hugs
Kimberly

Wednesday, September 11, 2013

Inspired By: Autumn Colors - Happy Fall Card


Hi CIP fans! Dana here today sharing a fall themed card for the Autumn Colors Challenge this week. I love patterned paper, so I chose a pretty leaf print and highlighted the design with several colors of Creative Inspirations paint.


I used Burnt Clay, Chocolate, Copper, Emerald, Rustic Red and Sunshine paint to help some of the leaves shine. I added some Clear Jeweled Inspirations for a little extra sparkle.


I made a pair of resin leaves with the NEW Resinesence and then painted them with Raw Sienna and Rustic Red paint.

Thanks for stopping by today!
~Dana