I first heard the words of my sentiment at a concert sung by the Chicago A Cappella a few weeks ago. These words made an impression on me and I knew I wanted to create a card around them. It was the perfect sentiment for the beginning of a new year. The words were printed on the computer.
The frame around the card is die cut using a Cheery Lynn die. I painted it using CI antique copper paint. The pointsettia and leaves are die cut using Spellbinders dies. I used garnet, sage, evergreen and buttercup paints. I just love the shimmer from the paints. It makes plain, inexpensive cardstock look so classy. I used a few jeweled inspirations to add the final touch of bling.
Barbara Washington--designer
Tuesday, January 3, 2012
Monday, January 2, 2012
Something New
Happy New Year!!
Sorry for the simple post yesterday, but I wanted to save the details for my post today!
This week's challenge is:
Inspired By: Something New
Remember, back in December we mentioned that Creative Inspirations Paint was adding Resplendence Glitter and Deliquesce Embossing Powders! Well we are happy to annouce they are available to purchase in the store!!
So I thought it would be fun to try some out for this card:
When I got my package of products, I was immediately attracted to the Deliquesce Super Sparkle Pink Embossing Powder! And thought it would be fun to use with this new Hero Arts stamp I got.
I first stamped my image in a light pink and then stamped it again in VersaMark and used the the Deliquesce Super Sparkle Pink Embossing Powder and heated it and I got this beautiful image:
I just love! I like the embossing powder even more with the final result! So fun!
I also used some Metallic Inspirations on this card in Matt Blue.
Make sure to check out all the new Resplendence Glitters and Deliquesce Embossing Powders!!
Have a great day!
Kendra
Sunday, January 1, 2012
CI Paints Inspired By: Something New
Thanks to all those who joined in last weeks challenge and shared their "Anything Goes" creations!
We hope everyone had a wonderful holiday season and now is enjoying a New Year! Wishing you a Happy and Healthy New Year!
Check the post below to see the December Winner and our Random.org Top 3!
---------------------------------------------
We hope everyone had a wonderful holiday season and now is enjoying a New Year! Wishing you a Happy and Healthy New Year!
Check the post below to see the December Winner and our Random.org Top 3!
---------------------------------------------
Each week you will be given a challenge to find inspiration in/from what ever the challenge theme is... you can be as literal or abstract in your inspiration as you want....Just make sure you can tie it back to the theme! Challenge closes at 6:00pm Eastern on Saturday.
You will always be able to jump back to the current challenge by clicking the "Current Challenge" link in our sidebar. The rules can always be found by clicking the tab "Challenge Rules" at the top of the page.
You do not need to use the Creative Inspirations Paints in your project, however, if you do, tell us which colors you used, and your name will go in the drawing twice! Each month, one person will win 5 jars of paint in the colors of their choice. The winner will be randomly drawn from all the people who have played that month, so make sure to join in on our challenges each week!
---------------------------------------------
This week's challenge is:
Inspired By: Something New
Kendra
---------------------------------------
I used fairy dust and Winter Frost; Something New is my stamp set I used.
Dawn
---------------------------------------
I used fairy dust and Winter Frost; Something New is my stamp set I used.
Dawn
---------------------------------------
Random. org Anything Goes Top 3 & Dec. Winner
Thanks to those who joined us last week for our Inspired By: Anything Goes challenge! Another week of great projects being shared with us, thanks, we love seeing all your work!
It's the first Sunday of the month, so we have a winner to annouce!!
CI Paints December Winner is..........
CONGRATS!!
If you can just send us an email with your mailing address, and the 5 colors you would like, we'll get your prize out to you: ci.shimmer.paint at gmail dot com
You're welcome to grab this badge for your blog:
------------------------------------------------------------------------
Here are the Random.org Top 3:
Beautiful work ladies!
You each recieved an extra entry in our November drawing.
You can grab this badge for your blog:
CONGRATS everyone!
Saturday, December 31, 2011
a new year's gift...
So, who's ready for 2012? (wow, really??? YIKES!)
As my gift to you, I wanted to share not just one technique today, but several! How's that for fun?
ewww... I just realized there is something sticky on my computer screen... yuck!
(Sorry, I'm getting sidetracked..)
Ok, back to the creativenesses...
First up, we have tissue ribbon...
For those of you who haven't been around here long enough, I LOVE altering white things with CI paints. It's SO much easier than storing a billion colors of everything just to realize that you still don't have the right color! Another thing about me is that I love using everyday things that are both inexpensive and easy to find. So let's start today with that tissue paper you may have laying around after wrapping those Christmas gifts.
Step 1: Cut tissue paper into strips (it is easies to just leave it folded like it comes in the package and cut through all the layers. They are thin, so you shouldn't have a problem.) You can use scissors, decorative edged scissors, or a paper trimmer. The width is up to you and what you want to use it for. I think I cut mine at 1-1.5 inches.
Step 2: Tape your strip down to a non-stick craft sheet.
(I promise this makes it SO much easier!)
Step 3: Paint your tissue strip with your choice of Creative Inspirations Paint. The tissue does get soft when wet, so be careful so it doesn't rip.
Step 4: If you want, you can stamp your tissue strip too. I like using small background textures for this, but be creative!
Once it is completely dry (including the ink) carefully remove it from the craft sheet. The tape won't come off of the tissue, so you will need to tear or cut it off, so if you are doing a specific length, keep that in mind.
Now that you have this fabulous tissue strip, what can you do with it? Well, you can use it as a border strip, you can pleat it, you can do all sorts of stuff with it... Here's a couple of my favorite ways...
First up, the ruffled rosette...
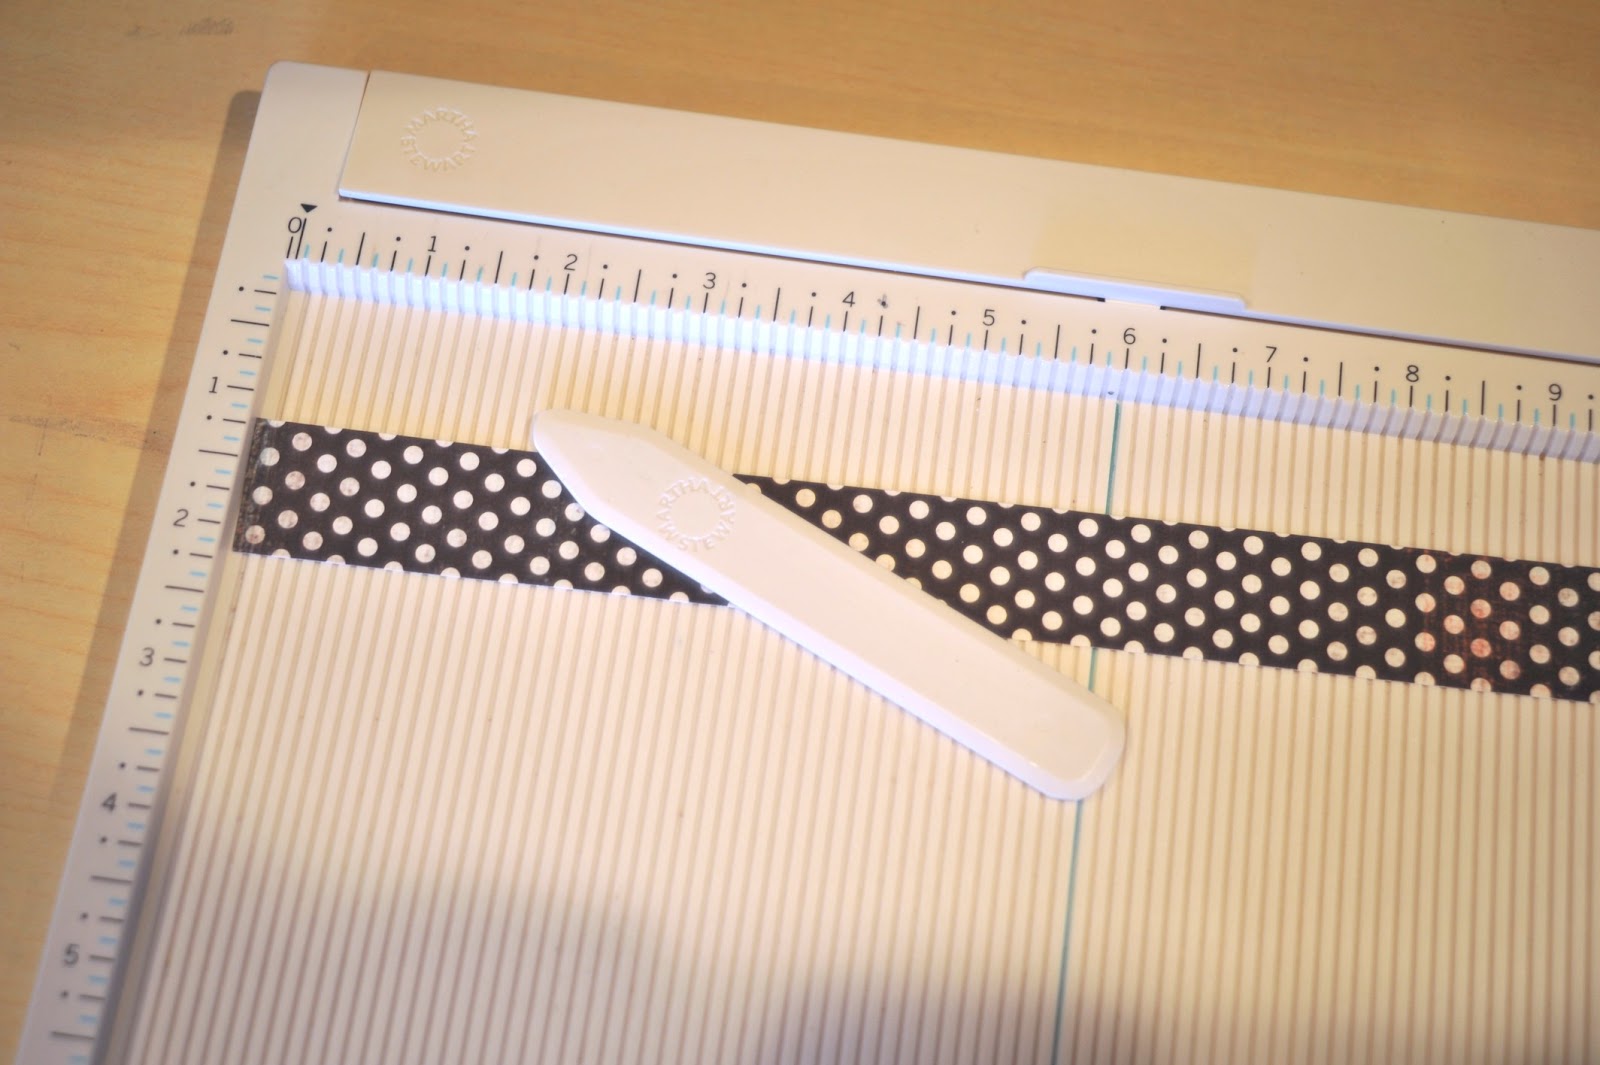
Step 1: Score a 1x12 inch strip of paper evert 1/4 inch. Scoreboards really help with this, but you can do it without. You can also buy dies that cut the strip and score it for you...
Step 2: Run a thin strip of dry adhesive along one edge of you paper, and attach your tissue strip, gathering slightly as you go.
Step 3: Fan fold your strip.
Step 4: glue ends together so you have a circle.
Step 5: put a circle of hot glue on your craft mat, and force your ring to gather and lay flat on the glue with the paper on the inside. Once cool, you can add brad or other decorative element to the center to cover the hole and glue.
Another favorite way to use the tissue strips is by making flowers with them....
Step 1: Gather the first little bit of the strip along one edge, and pinch.
Step 2: Continue gathering the edge into a circle. Keep the center pinched tight. Continue gathering and turning until the flower is as full as you like...
(I promise the hardest part is just getting it going. Once you've got it going, it's quick easy!)
Step 3: Staple the center. I like using Tim Holtz tiny attacher because the staple is... well, tiny.
Step 4: Fluff the layers and add some ink around the edges for definition.
Step 5: Add a center to cover the staple.
Well, if you're still with me, you are awesome! I know this is a long post, but I have one more technique to share... This one starring the new Deliquesce embossing powders we carry here at CI.
Step 1: Cover paper with plastic canvas (or any other stencil type thing you wish) and use a palette knife to spread on some modeling paste (also known as texture paste depending on the brand). You can carefully make sure each square is filled perfectly, or you can just randomly smear some paste on and let it be imperfect.
Step 2: Carefully remove your plastic canvas. Don't let it slide, you want it to lift straight off. You may need to persuade it a bit though.
Step 3: Cover it completely with Deliquesce powder. I'm using the Gold Crystals (which may well be my favorite one!)
Be sure to do this over a scratch paper so you can pour the excess back in the jar for future use.
Step 4: Shake off the excess, and heat. The heat will not only melt the powder, it will cause the paste to bubble. This give you FABULOUS texture!!!
Isn't that a fun background???
Someone even asked me if I had glued on a bunch of tiny gems... LOL! I may be crazy enough to do that, but this is SO much simpler! =)
Happy new year every one! May it be one full of happiness and wonder!
Enjoy!
~Kassi
Labels:
tutorial
Wednesday, December 28, 2011
Sunflower Birthday Card
Hi everyone! Carla here today... sorry for the lateness of today's post... I can't believe it's Dec. 28th! I hope you all had a great Christmas!!
I decided to go a little summery for today's post. I feel like all I've done for the past 2 months is Christmas cards and I needed a change! And you can't go wrong with Sunflowers right?!
The flowers on here started off as white Prima flowers from a pilar pack. I painted them with Sunshine first and then added highlights with Buttercup and darkened the centers with Mango and Chocolate CI Paints. Then I added brown gems to the centers to finish them off.
I painted a scrap of Ranger's Sticky Back Canvas with Chocolate paint and to lighten the center, I added Gesso with a wet paintbrush. Beware that this also masks the shimmer, but for this card, I was fine with shiny edges only. Then I just heat embossed a Happy Birthday message in gold embossing powder over the Gessoed area (is that even a word?... I know you know what I mean!)
As a little extra hint of glimmer, I used Evergreen paint to highlight and darken the leaves on the patterned paper I was using for my background (you can see it in the photo, especially on the right). I often make subtle changes to patterned papers like that, and it helps tie in the very shimmery flowers with the rest of the elements of the card.
Cheers for now!
Tuesday, December 27, 2011
Time to Relax

Wow! What a whirlwind this Christmas has been! I know the holidays aren't quite over yet, but this year is quickly winding down, and the perfect time to kick back and relax! I hope today's card will inspire you to do the same!

Creative Inspirations Paints
Fuchsia
Ivory
Antique Copper
Burnt Clay
Blush
Beige
Stamps and Papers from Kanban Crafts
Fuchsia
Ivory
Antique Copper
Burnt Clay
Blush
Beige
Stamps and Papers from Kanban Crafts
Labels:
Antique Copper,
beige,
Blush,
Burnt Clay,
Fuchsia,
Gini,
ivory
Monday, December 26, 2011
Salty Glimmers Christmas
Hi, it's Holly posting today. I'm sharing a Christmas card I made last week - yeah it was a very LATE holiday card. LOL
I started out by creating a background using the Salty Glimmers technique from Technique Junkies. What a cool background, and I love the shimmer! After I cut out the lamp post, the Christmas lights strings, and the lightbulbs, I wanted to make them shimmery as well, so I pulled out my Creative Inspirations Paints.
The lamp post and the light strings were die cut from black cardstock, and I applied some Antique Silver paint to those. I love how the Antique Silver paint looks against the black cardstock. The lightbulbs were painted with Garnet paint, and they really pop out against the die cut fence and the dark blue background. I also painted a tiny piece of white cardstock with some Sunshine yellow paint and adhered it behind the die cut lamp.
The Victorian Picket Fence was die cut from kraft cardstock, and I lightly rubbed a white ink pad here and there to give the fence a snowy look. Well, white ink doesn't dry very fast, so I covered it with some white embossing powder and hit it with a heat gun. Did you know that Creative Inspirations Paint will have embossing powders and glitters for sale in January?? That is a wonderful addition to the paints - more sparkle, more shimmer!
Wanna see the great shimmer?
Stamps: Candy Kisses (Rogue Redhead Designs)
Ink: Jet Black Stazon, Fresh Snow
CS: white, black, kraft
Cheery Lynn Designs dies: Victorian Picket Fence, Christmas Light Swag, Colonial Lamp Post
Creative Inspirations Paint: Garnet, Sunshine, Antique Silver
Other: Frosty Nights glimmer mist, oval punch, scallop oval punch, white embossing powder
TJ Technique: Salty Glimmers
Sunday, December 25, 2011
CI Paints Inspired By: Anything Goes
Thanks to all those who joined in last week and shared their "Holiday" creations! Beautiful projects everyone!
We'd like to wish everyone a Merry Christmas! We hope you have a wonderful time with family friends! If you don't celebrate, have a wonderful day!
Just a friendly reminder, that this is the last challenge of the month, so we will be drawing a winner next Sunday!!
Check the post below to see the Random.org Top 3!
---------------------------------------------
Each week you will be given a challenge to find inspiration in/from what ever the challenge theme is... you can be as literal or abstract in your inspiration as you want....Just make sure you can tie it back to the theme! Challenge closes at 6:00pm Eastern on Saturday.
You will always be able to jump back to the current challenge by clicking the "Current Challenge" link in our sidebar. The rules can always be found by clicking the tab "Challenge Rules" at the top of the page.
You do not need to use the Creative Inspirations Paints in your project, however, if you do, tell us which colors you used, and your name will go in the drawing twice! Each month, one person will win 5 jars of paint in the colors of their choice. The winner will be randomly drawn from all the people who have played that month, so make sure to join in on our challenges each week!
---------------------------------------------
This week's challenge is:
Inspired By: Anything Goes
With the holidays, we decided to keep this challenge pretty open for whatever you would like to share with us.
Here's some inspiration:
Kendra
---------------------------------------
I used some Tanzanite and Blue Ice for the sky and Autumn Wheat for the sand.
Just wanted to share my Little Bethlehem scene on a canvas.
Dawn
---------------------------------------
HAPPY HOLIDAY'S!
Have a great week! We hope you'll share your creations with us!
---------------------------------------
---------------------------------------
Random.org The Holiday's Top 3
Thanks to those who joined us last week for our Inspired By: The Holidays Challenge!
Here are the Random.org Top 3:
You each will receive an extra entry in our November drawing for some CI Paints of your own!
You can grab this badge for your blog:
Saturday, December 24, 2011
Paint, heat and have fun with chipboards
Hello, dear Creative friends! Irit is here again and this time we are going to learn how to make Creative Inspirations shiny paints bubbles. Yes, cool bubbles we can get usually with UTEE, but we don't need it if we use our paints. But we still need a Heat gun, also this time a hear dryer can do a job too.
Product list:
Creative Inspirations paints: Bright Yellow, Sea Foam, Canary
White bare chipboards- clouds and sun: Tando Creative
Blue ink : Quick Quotes
Yellow ink: Ranger
White gesso
Heat gun
Step 1: Ink your white clouds chipboards with directly to the pieces inking with any blue ink. Let it dry. Add a bit of white gesso with fingers, random spots here and there over the clouds only. Let it dry.
Step 2: Still with your fingers add some Sea Foam paint over the clouds, cover your white paint a bit. Heat over the wet paint with your heat gun. Let it bubble as much as you want, then let it dry. Your clouds are finished.
Step 3: Add some yellow paints randomly and with fingers over your yellow inked sun. This piece is not inked, just painted with Creative Inspirations Paints. Heat the wet paint a lot till you see bubbles and let it dry. For the tutorial I used a circle chipboard, the sun shape is on my finished page,still the very same technique used.
Step 4 and final: Adhere you painted shapes on your finished project, I made those shapes for this shiny and adorable page of my first and only grandson Omer.
Paints used here:
See you in 2 weeks - this is a next year already- with another fun tutorial!
Happy New Year to all of us!
Subscribe to:
Posts (Atom)