Inspirations

Inspirations
The color you see is the color you get!

Thursday, September 30, 2010

drum roll please....

Hello all my wonderful friends!

Today I've got some exciting news about upcoming changes....

1. Starting October 2, we will have posts EVERYDAY here on the CI blog!
2. You will find fabulous inspiration from a different DT member every Monday- Friday!
3. Monday Inspiration is being moved to Saturdays... you can still expect to see techniques there!
4. Sundays will be..... Challenges!

A little info about the challenges...
When? Each Sunday, a new challenge will be announced. The challenges close Friday night at 7 PM Eastern Time.
Who can play? These are free for everyone to join in. You DO NOT have to use the Creative Inspirations Paint, but if you do, you will get your name in the drawing twice.

How do I play? Use Mr. Linky at the bottom of the current challenge post to link your blog post, or online gallery to our site. Please make sure you are linking the blog post that contains your challenge project, not just your blog.

Can I still play if I don't have a blog or online gallery? YUP! Send a picture of your project as well as a brief description (including the names of the CI paints you used if any) to ci.shimmer.paint@gmail.com

Are there prizes? YES!!! At the end of each month we will have a random number drawing of all the participants from that month (remember, you will get your name in twice per project if you use the CI paints... this means if you play all 4 weeks, and you use the paints, you would have your name in the drawing 8 times.) The winner will be announced the first Sunday of the new month, and they will get 5 jars of paint in the colors of their choice!

Well, there is the basics... I'll put all this info on a tab this weekend.

So, now what I'm sure everyone has been waiting for..... The new DT!

Returning:
Kendra Sand
Barbara Washington
Shelly Schmit

New:
Jan Hennings
Karen Wilson
Samantha Star
Chris Dickinson
Rebecca Price
Kianel
Jenn Koss

I hope you are all as excited as I am about all the fun stuff coming! Have a fabulous day, and I'll be back Saturday!

Tuesday, September 28, 2010

Tuesday Color Spotlight: Denium

This week's color is DENIUM!  It happens to be one of the limited edition colors right now!  Make sure to order this color or you get it in the set of four limited edition colors before they're gone (and save some money)!  Order before Decemeber 31st!

Color in the cover:


My creation:

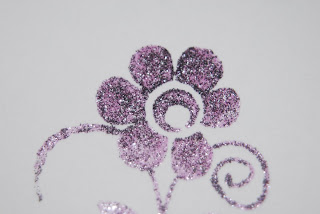
 I used CI Paint DENIUM to give the background stamp I used a little shimmer.  How fun to use the paints to also color in background stamps!  The shimmer adds just the right touch to make the card complete.

I also colored in the main flower with the paint!

I just love these paints!

Have a great day!  Check back Thursday to hear about all the fun changes for the next term!  We have a lot in store for you!!  It's going to be fun!

Have a nice day!

Kendra

Monday, September 27, 2010

goin' for a dip...

Hello everyone! It's Monday Inspiration time....
However, I just have a quick couple of tips for you today instead of a full tutorial. Why? Well, October starts this week, and with it will come some big changes to the blog. (I'll tell you more of the exciting stuff on Thursday). Because of these changes, Monday Inspirations is getting bumped.
Never fear, we aren't DUMPING it, just BUMPING it.
Starting this week, I'm gonna be taking Saturdays by storm!

However, I don't want to disappoint any of you by not having something to share today, so, let's do a quickie on brads!

The easiest way to alter your brads with the deliciously shimmery Creative Inspirations Paint is to hold the brads with a good pair of tweezers and dip the top into the jar of paint. This will give you a nice even coat in one step. You can then stick your brad into a piece of floral foam (or other similar product) to keep it standing upright as it dries.

Here is the real secret to great altered brads.... Ready for it?

After the paint is dry, give it a nice coat of Glossy Accents by Ranger. This does a couple of things...
1) As you can see from the photo, it gives it a nice shiny finished look without hiding any of the color or shimmer. (the one on the left has just paint, the one on the right has Glossy Accents over it.)
2) It will protect the paint from scratching off the metal brad. (this is a biggie for me. I've been altering brads with the paint for a while, but I didn't want to share it with all of you because I hated that the paint scratches off the brads. This fixes the problem!!!)

Doing the extra step does take more time because it takes a while for the Glossy Accents to dry... And you all know how impatient I am! However, I think the result is completely worth the extra effort!!!

Have a fabulous day! I'll be back soon with more exciting news!!!

Thursday, September 23, 2010

movie night...

Raise your hand if you're ready for some DT inspiration... I'm waiting... Every hand should be up at this point... *sigh* oh well, ready or not, here it comes. LOL! =)
This week's team was asked to find their inspiration from their favorite movie.... Can you guess each movie? As always, click on the designer's name to get more info on their projects.... So grab some popcorn and enjoy the projects!


Good stuff, huh!
I'll right everyone... I'm in the mood for a good movie! I'll be back soon! Have a fabulous day!

~Kassi

Tuesday, September 21, 2010

Tuesday Color Spotlight: Sage

Once again it's Tuesday, so that means another featured color. This week I've chosen SAGE! Such a pretty green color!

Color in the cover:

This past weekend I was at the Mall of America for Scrapfest, what fun!! Anyway I had taken a class by Prima Marketing - I just love flowers!! Anyway the leaves below were cut out of some of the packaging from the flowers we used to make the LO below.How cool is that? I have never really looked at the packaging from products before, but they encouraged us to start taking a closer look at the packaging and try re-using it for projects. So we cut these leaves out - and obviously as I was in the class I kept thinking - "I can't wait to get to my CI Paints to add some shimmer to this project!!" :) So when I got home I added SAGE to the leaves to give them some shimmer!

Here's the layout:

Two close-ups of the bottom right flowers and leaves with CI Paint SAGE!
I also used SAGE to alter my paper. The top half has some circles that I thought it would be fun to add some shimmer to.
I also used the remaining paper I had from the layout to make this card:
A very simple, yet elegant card!

A close-up of the flower cluster. Again I used CI Paint SAGE to add shimmer to the leaves!
Using the paints just adds such a beautiful end touch to all projects! I just love these paints!

Check out SAGE along with all the other great colors you can choose from when ordering! SAGE would be great for those Christmas tree's on the holiday cards that we'll will have to be starting soon!

Have a great day!

Kendra

Monday, September 20, 2010

lickety-split-press-dump-flick...

Guess what everyone.... I's MONDAY! *yes, I realize that for many people this is not cause to celebrate...* Monday, for me, means that I get to hop on here and share a new technique with all of you, and that just makes me happy. =)

For today's Inspiration Monday, I have a technique I came across while experimenting with my stash of stuff... I don't know that it has an official name, so I am hereby naming it "textured stamping". I considered naming it something like "molten matter stamping", or "Lickety-split press-dump-flick stamping" because those names sounded fun, but then my slightly more rational side kicked in and said that those names probably wouldn't catch on....

You will need:
paper (1 to stamp on, and 1 scrap paper)
stamp
cleaned out stamp pad, cut n'dry foam, or makeup wedge
Creative Inspirations Paint (color of your choice)
embossing powder (color of your choice)
heat tool

*please note: like my one name said, all steps of this technique need to be done lickety-split... or in other words, in rapid succession. It helps to have everything open and ready before you start*

Step 1: Load up your clean stamp pad, cut n'dry foam, or makeup wedge with Creative Inspirations Paint.

Step 2: Ink up your stamp with paint. I am using a makeup wedge and Tickled Pink CI paint here. You need a good thick layer of paint, so I use a pouncing motion.

Step 3: Stamp on you project. (sorry, no picture of that one...)

Step 4: QUICKLY move your stamped image onto your scrap paper and dump embossing powder over it. (you don't have to use a scrap paper, but it makes clean up easier)

Step 5: GENTLY flick or tap the back of your stamped paper to make loose powders fall off. Because of how quickly the paint dries, you will not get a full coverage of powder... that is part of the charm of this technique. The more you tap, the more powders will fall off, so you can control, to some extent, how much powder you leave on to emboss.

Step 6: Heat emboss as usual.

Here is a sample of what it might look like. I used Tickled Pink CI paint, and black embossing powder. I left quite a bit of powder on the image before embossing. Because the entire image is not covered in embossing powder, you end up with what looks like drops and puddles of melted enamel (hence the "textured" part of the technique.)

Here is another sample. This one is done with Blush CI paint and brown embossing powder. I flicked a lot more off this image, so it is more sparsely textured.

Quick tip: I always stress that you should clean your stamps immediately after stamping with paint so the paint doesn't dry on your stamps. However, with this technique, you don't have time to clean up right away. So... I keep a squirt bottle full of water and a little bit of liquid dish soap, and a soft bristled toothbrush in with my stamping supplies. Squirt your stamp with your soapy water and gently scrub with the toothbrush. This will help get all the paint and shimmer out of even the smallest areas of your stamp. You can then wipe off the soapy mess with a rag, or rinse under running water. I do this with my rubber stamps as well as my clear stamps.

and here is my project highlighting this technique
Paper: Scribble Scrabble, white cardstock
Stamps: Fancy Pants "Fresh Mod", "On a Whimsey", "Doodles and Things", Glitz "Distressing"
Ink: Memento, Mark-it, VersaMagic
CI paint: Emerald
Die Cut: Nestablilities "Label Six"
Other: Pirate Gold embossing powder, ribbon

Here is Mrs. Warty Frog.... *grin* I love the texture on the frog, it just makes it even cuter!

Here you can see that the CI paint shimmers though brilliantly!

Well, I hope this got some of your wheels turning. Give it a try, and share your creations with up by using the link button on our sidebar!

Have a fabulous day!


Thursday, September 16, 2010

book club

Hello everyone!
We are now halfway through September... Schools have started again, the nights are getting colder, and our thoughts turn to indoor activities. And so, I challenged this week's DT to find inspiration in one of their favorite books. And what beautiful creations they have made! Be sure to click on the designer's name to get more details on their projects!


Such fabulous projects! Thanks for sharing with us girls!!!

And thank you to all who sent in applications for our DT call! We got a great response! I have to say, it is going to be VERY hard to choose. Good luck to you all!
~Kassi

Tuesday, September 14, 2010

Tuesday Color Spotlight: Sky Blue

Are you ready for another amazing color? I hope so, because it's Tuesday....so today's Color Spotlight is SKY BLUE!

I created this adorable card a few week's back and thought it would be a nice one to share. I just think this House Mouse stamp is so cute.

I usually always color the flower pink or purple, but for a change I colored it blue!


I first used a prang colored pencil to color in the flower (Gray Blue) and then used CI Paints SKY BLUE to color over the top to give it some shimmer! Isn't it pretty?
I thought I'd start including a picture of the paint inside the cover as well, to show off to all of you!
Here is the paint on white cardstock. Using colored pencils first just makes it a little brighter. But it is fun to just use the paints like this with a waterbrush. The more layers you put on the dark it will also become. This is just one stroke with a paint brush.
When you order your paints, make sure to post a link to your blog in our inlinkz, we'd love to see what you have created!!
Have a wonderful day!
Kendra

Monday, September 13, 2010

aged buttons...

When I was growing up, my mom kept a big jar of buttons in her closet. My sisters and I would spend hours playing with those buttons. I loved looking at all the different sizes, shapes, textures and colors. I loved scooping up handfuls and letting them trickle through my fingers making a musical clinking as they landed back in the jar. And I can't count the number of times we served "Button Soup" to the family.

Perhaps because of that, I have always loved buttons. And, as buttons have become such a popular craft embellishment, I have accumulated my own large jar of random buttons. So, for today's Inspiration Monday, I thought I would show you one way that I alter buttons.

Aged Buttons

You will need:
Buttons *light colors are easier to paint over*
Sticky note
Creative Inspirations Paint *color of your choice*
Crackle Accents by Ranger
Dye ink *I like Distress ink by Ranger*
Makeup wedge
Ink blending tool

Step 1: Pull off a sticky note, and flip it over. There is a strip of temporary adhesive on the back. Stick your buttons onto that. This allows you to hold you buttons without your fingers getting in the way.

Step 2: Using a makeup wedge, apply the Creative Inspirations paint to your button in a pouncing motion.
Step 3: The paint will go on fairly thinly, so you will need to build up a few layers. Allow your button to dry, and pounce on your next layer.

Step 4: Continue adding layers until your button is completely covered and the original color of the button no longer shows through.

Step 5: Let your button dry completely. This is important!

*Crackle Accents by Ranger is the real secret to this technique. *

Step 6: Apply a coat of Crackle Accents to your button. How thick you apply it will determine how small or large your cracks are. I like to apply a nice thick coat for larger cracks, but it is up to you.

Step 7: Let dry NATURALLY. Depending on how thick your coat is, this could take a while. Don't be tempted to speed it up with a heat gun as that will ruin it. *This part is the hardest for me. I HATE waiting! I usually set the buttons aside and work on another project. Because they are on the sticky note, they are easily moved.*

As your button dries, cracks will form. These cracks are random and no two buttons will end up the same. *I love that!*

When your button is completely dry you can add ink. You don't have to do this, but it does add contrast and the cracks show up better.

Step 8: Using an ink blending tool, rub ink into the cracks. This takes a little pressure, so don't be afraid to really work the ink in.

Step 9: Gently wipe the excess ink off of your button with a slightly damp rag.

You will be left with ink only in the cracks like this. When your ink is dry, you are ready to attach it to your project.

Here is the project I did featuring this technique:
Paper: Coredinations, white cardstock
Stamps: Fancy Pants "Doodles and Things", "On a Whimsy", Glitz "Distressing"
Ink: VersaMagic, Distress Ink, Memento
CI paint: Mango
Other: Provo Craft "Polka Dots" embossing folder, ribbon, buttons, Crackle Accents by Ranger

You can see that the shimmer from the CI paints still shows through beautifully.

Here's to having fun with your stash of buttons today!