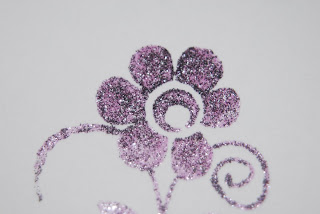
Guess what everyone.... I's MONDAY! *yes, I realize that for many people this is not cause to celebrate...* Monday, for me, means that I get to hop on here and share a new technique with all of you, and that just makes me happy. =)
For today's Inspiration Monday, I have a technique I came across while experimenting with my stash of stuff... I don't know that it has an official name, so I am hereby naming it "textured stamping". I considered naming it something like "molten matter stamping", or "Lickety-split press-dump-flick stamping" because those names sounded fun, but then my slightly more rational side kicked in and said that those names probably wouldn't catch on....
You will need:
paper (1 to stamp on, and 1 scrap paper)
stamp
cleaned out stamp pad, cut n'dry foam, or makeup wedge
Creative Inspirations Paint (color of your choice)
embossing powder (color of your choice)
heat tool
*please note: like my one name said, all steps of this technique need to be done lickety-split... or in other words, in rapid succession. It helps to have everything open and ready before you start*

Step 1: Load up your clean stamp pad, cut n'dry foam, or makeup wedge with Creative Inspirations Paint.

Step 2: Ink up your stamp with paint. I am using a makeup wedge and Tickled Pink CI paint here. You need a good thick layer of paint, so I use a pouncing motion.
Step 3: Stamp on you project. (sorry, no picture of that one...)

Step 4: QUICKLY move your stamped image onto your scrap paper and dump embossing powder over it. (you don't have to use a scrap paper, but it makes clean up easier)

Step 5: GENTLY flick or tap the back of your stamped paper to make loose powders fall off. Because of how quickly the paint dries, you will not get a full coverage of powder... that is part of the charm of this technique. The more you tap, the more powders will fall off, so you can control, to some extent, how much powder you leave on to emboss.

Step 6: Heat emboss as usual.

Here is a sample of what it might look like. I used Tickled Pink CI paint, and black embossing powder. I left quite a bit of powder on the image before embossing. Because the entire image is not covered in embossing powder, you end up with what looks like drops and puddles of melted enamel (hence the "textured" part of the technique.)

Here is another sample. This one is done with Blush CI paint and brown embossing powder. I flicked a lot more off this image, so it is more sparsely textured.
Quick tip: I always stress that you should clean your stamps immediately after stamping with paint so the paint doesn't dry on your stamps. However, with this technique, you don't have time to clean up right away. So... I keep a squirt bottle full of water and a little bit of liquid dish soap, and a soft bristled toothbrush in with my stamping supplies. Squirt your stamp with your soapy water and gently scrub with the toothbrush. This will help get all the paint and shimmer out of even the smallest areas of your stamp. You can then wipe off the soapy mess with a rag, or rinse under running water. I do this with my rubber stamps as well as my clear stamps.
and here is my project highlighting this technique

Paper: Scribble Scrabble, white cardstock
Stamps: Fancy Pants "Fresh Mod", "On a Whimsey", "Doodles and Things", Glitz "Distressing"
Ink: Memento, Mark-it, VersaMagic
CI paint: Emerald
Die Cut: Nestablilities "Label Six"
Other: Pirate Gold embossing powder, ribbon
 Here is Mrs. Warty Frog.... *grin* I love the texture on the frog, it just makes it even cuter!
Here you can see that the CI paint shimmers though brilliantly!
Well, I hope this got some of your wheels turning. Give it a try, and share your creations with up by using the link button on our sidebar!
Have a fabulous day!

1 comment:
Great tutorial and I love the little frog card!
Post a Comment