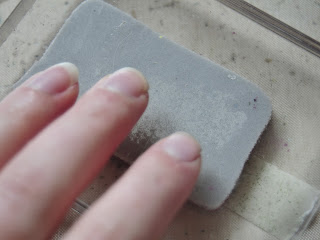
Hello my wonderful friends!
I'm so glad you chose to "stick" with me today.
ok... so I really couldn't resist that one. :)
Today has been one of those days where things REALLY don't go as planned. The package I was expecting in order to finish a project (for today's deadline) didn't show up... A tutorial I was putting together for something else ended up looking AWEFUL... I put together another tutorial, and miss the deadline anyway.... I'm sure you get the idea.
This tutorial didn't really go as planned either. Well, I guess you could say I didn't HAVE any plans for it. I had planned to post one of the other tutorials I have in my "waiting to post" file since I knew today would be hectic.
However, while waiting for the mail (that was supposed to come bearing my package) I had a little free time to play with an idea that had popped into my head.
It ended up working, and since I was so excited SOMETHING to work out today, I decided to use this tutorial so my day was not totally wasted. LOL!
It is actually based on a technique posted over on Splitcoaststampers using masking tape as a stamp... However, I did what I like to do with SO many techniques... I put my own twist on it.
Step 1: tear off various sizes of masking tape. How many and what lengths is up to you and your project.
Step 2: ink up the sticky side of the tape by pressing it onto an ink pad. I have found that a light touch is best. You don't need a lot of ink.
Step 3: "ink" up a texture stamp with Creative Inspirations Paint. I do this by pouncing on a little CI paint using a makeup wedge. (avoid text. I say this only because when you stamp it from the tape it will be in reverse... kinda loses the awesomeness of a sentiment if you need to use a mirror to read it...)
Step 4: stamp the sparkly texture onto the sticky inky side of the tape.
Step 5: Working quickly, flip the tape over and press it onto your project. Go ahead and press it down.
Step 6: Carefully peel off the tape to reveal your imperfectly awesome design!
And, because of the extra little step in there using the CI paint... our masking tape prints have shimmery designs!
Pretty sure I'm liking this one!
How super simple!!!
Enjoy!
PS: As with any paint, don't forget to wash your stamp as soon as you can, and wash it well! Some warm water and a soft bristle toothbrush for the little nooks and crannies will take the paint right off.
Supplies Used:
Paper: DCWV, cardstock
Ink: Distress Ink, Colorbox Pigment
Stamps: Unity "Love In Return", My Mind's Eye "Tickled Pink"
Creative Inspirations Paint: Chocolate
Other: rhinestones


4 comments:
How fun! I've never seen it done this way, flipped over. It looks fabulous, and kept it's shimmer! :)
Awesome technique!
WOW! Very cool and fun technique!!
great idea Kassi,
Post a Comment