Inspirations

Inspirations
The color you see is the color you get!

Saturday, November 12, 2011

Smell of Japan.. Kind of

Hello, dear painters! Irit is here again and this time with my own mixed technique  of making a background grid with Wonder Tape, paints and microbeads and finally to make  a Japanese style tag...
OK, kind of.. I don't have any Japanese stamps or products, but I am sure that  they are known for this Cherry blossom festivals.
Here is our  product list:
Cardstock  white tag- Ranger, but any tag will do.
Pink cardstock- American Crafts, but any pink will do as we are going to paint  after all.
Wonder tape- 1/8''
Creative Inspirations Paints: Ivory,Fuchsia, Blush
Microbeads- silver, any brand you have.
And for embellishments: Sacura punch (EK), crystals and pearls, ribbons


So here we go!
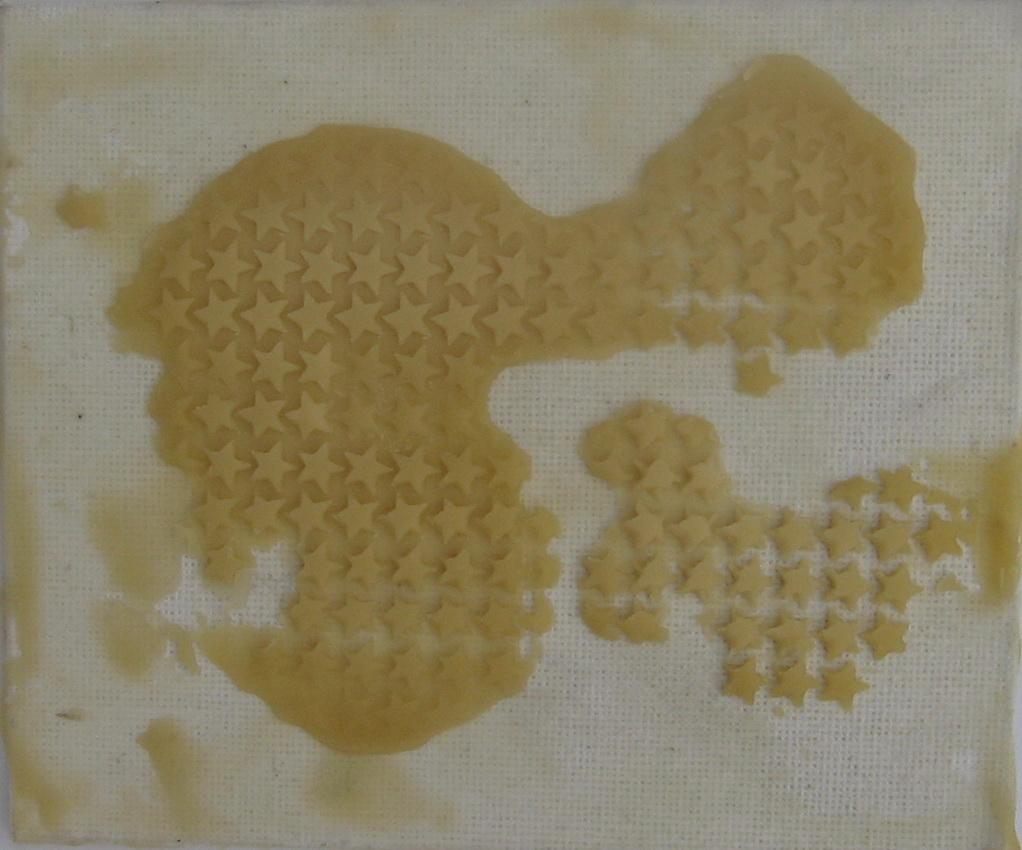
Step 1: Add your Wonder tape randomly over the tag and please, don't overlap it as we want to be able to peel it later. Now begin to paint with you paints  and don't afraid to paint over the lines, Using a tape for a grid painting makes it very easy to paint without a lot of fine work. Let it dry and really, let it dry… A lot of time, unless you want those microbeads to be over you paint as well.


And here are the paints I used on this project:


Step 2: Peel the orange tapes and sprinkle some silver microbeads all over the peeled glue. Add as much
as you want till the full coverage.
Your background is done and you can see the beaded background on the final project as  I just forgot to take my photo on this stage of crafting.
Step 3: Punch a lot of Sacura flowers from the white or  light pink cardstock. Add some  pink paint over.  Glue your flowers randomly over your tag, I adhered them on the places with bad microbeards coverage, mostly junctions, let them dry. Add some crystals and pearls as your flower centers. Add some clear glaze to keep those  pearls and crystals on their place as this " self adhesives" are non adhesives after all.. LOL.
 Tie  a few  ribbons and twines  inside your tag. 


Your tag is done! 
Now try this technique with another colors  and different embellishments. like blues and stars, browns and leaves etc.– works great!
See you next week with another fun tutorials using Creative Inspirations Paints.

Irit

Thursday, November 10, 2011

Tag - Kianel

Hello,
Kianel here with you sharing a tag i made using Creative Inspirations paints. The stamp is a Sugar Nellie and the dies are from Cheery Lynn Designs. I covered some of my dies and the rose too with Creative Inspirations paint "winter frost" and mixed it with adirondack ink to color my stamped image.


Here is a close up that shows the shimmer on the dies.

I also wanted to show you a pair of cards i made with a Christmas kit i am part of and i used the marvellous Creative Inspirations paints "emerald" "sage" "sky blue" "rustic red" "garnet" "winter frost".


Take care and have fun. Don't forget our weekly challenge every sunday! Love from France, Kianel.

Wednesday, November 9, 2011

Shimmery Heirloom Ornament Card


I can't tell you how excited I am to be posting my first project on the blog as part of the Creative Inspirations Paint DT! Already, I am having a blast playing with these fantastic paints and can't wait to share many more projects with you all in the future!

But now let's get to this week's project shall we?!


  • I used the Spellbinders "2010 Heirloom Ornament" dies to cut out the ornament after I stamped and embossed it with the matching JustRite "Merry and Bright" stamp set.

  • Next I colored in the ornament image with Garnet, Gold and Caramel.

  • I stamped the sentiment separately and punched it out with 1 1/4" punch and popped it up on the ornament.

  • Then I inked all the edges with Antiue Linen distress ink to make the edges stand out a little.

  • Finally, I painted a peach colored silk ribbon with the Garnet paint to match the ornament and attached it along with a few pearls as a finishing touch.

  • The label was cut with Spellbinders "Labels 8" die and stamped with Hero Arts "Pine Bough" stamp in Peeled Paint Distress ink.

  • The card base was a light green cardstock stamped with Hero Arts "Raindrop Background" in Peeled Paint Distress ink

  • The final touch before assembly was to use a fan brush to "white wash" over the background in Ivory to give it a fantastic pearly shine!

Here you can see the Creative Inspirations colors I used, from left to right they are; Garnet, Gold, Caramel and Ivory.


Finally, here, I hope you can see the shine! I know it's hard to see on the ornament because it is so intricate but you can really see the shimmer on the ribbon and on the background.

Hope you anjoyed today's project! Thanks for stopping by!


Cheers,

Tuesday, November 8, 2011

Tis The Season


Hi, it's Gini and today is my first time to post on the Creative Inspirations Paint Blog - Yay! Can you believe, it's really time for Tis the Season? The whole Christmas season is one of my favorite times of the year - so I hope you enjoy this card!


To make my dimensional wreath, I used the Boxwood Vine Wreath die from Cottage Cutz.
I cut my dies using white cardstock, but then colored them using Creative Inspirations Paints, before a punched them away from the paper. For the bottom layer of the wreath, I used Emerald, for my shadows, and for the top layers, I used the lighter Evergreen. For my reds, I used Garnet and Rustic Red.


It's really fun to color your die cuts as you go - and with Creative Inspirations Paints, you have so many exciting choices!


Monday, November 7, 2011

Princess Layout

I have a sweet layout to share with you this morning!!

I am super happy with how it turned out dispite not having the cute pictures printed out for it yet.


I cut "princess" from my Cricut.

I added "Amethyst" to the letters to add some shimmer! I mean what princess layout isn't complete without shimmer?!

And... 


I love bling, so I loaded this layout up with a ton of jewels!
I used jeweled inspirations clear SS20.

Have a wonderful day!

Kendra

Sunday, November 6, 2011

CI Paints Inspired By: Anything Goes


Thanks to all those who joined in last week and shared their "Fall" creations!

Check the post below to see the Random.org Top 3 and our October Winner!!

---------------------------------------------

Each week you will be given a challenge to find inspiration in/from what ever the challenge theme is... you can be as literal or abstract in your inspiration as you want....Just make sure you can tie it back to the theme! Challenge closes at 6:00pm Eastern on Saturday.

You will always be able to jump back to the current challenge by clicking the "Current Challenge" link in our sidebar. The rules can always be found by clicking the tab "Challenge Rules" at the top of the page.

You do not need to use the Creative Inspirations Paints in your project, however, if you do, tell us which colors you used, and your name will go in the drawing twice! Each month, one person will win 5 jars of paint in the colors of their choice. The winner will be randomly drawn from all the people who have played that month, so make sure to join in on our challenges each week!

---------------------------------------------

This week's challenge is:

Inspired By: Anything Goes

That's right, share any kind of project with us that you would like!


Here's some inspiration:
Dawn


Kendra

Have a great week!  We hope you'll share your creations with us!


---------------------------------------

October Winner and Fall Random.org Top 3

Thanks to those that joined in our "Fall" challenge last week!  What some wonderful creations!  Check below for the Random.org Top 3!

Just wanted to say, it is also great to see all the familiar names each week, thanks for always joining us and checking in!


It's the first Sunday of the month, so we have a winner to annouce!!

CI Paints October Winner is..........


CONGRATS!!

If you can just send us an email with your mailing address, and the 5 colors you would like, we'll get your prize out to you: ci.shimmer.paint at gmail dot com

You're welcome to grab this badge for your blog:

------------------------------------------------------------------------

Here's our Random.org Top 3!
Here are the Top 3:


Beautiful work ladies!

You each recieved an extra entry in our October drawing.

You can grab this badge for your blog:

CONGRATS everyone! 

Saturday, November 5, 2011

Stars around us with Creative Inspirations paints


Hello, dear readers! I am Irit and this is my very first tutorial made for Creative Inspirations Paints.
Today we are going to learn how to use Bee Wax together with our sparkle paints.
Our product list:


Small canvas: 4*5''
Bee Wax- I used the Natural color, but any white wax can be used too.
Heat gun and small metal plate, also you can heat the wax in any other safe way too. Please remember that metals  are not for Microwaves, so if you want to try Microwave, find some MW proof  plastic  jar.
If you have a melting pot- please feel free to use it as it's the best.
White bare chipboards stars: Tando Creative
Dew Drops: Robin's Nest
Star shaped sequin waist: Gauche Alchemy
Creative Inspirations Paints: Ivory, Sea Glass, Royal Blue, Tanzanite, Silver
Non permanent glue
 Glossy Accents : Ranger

Step 1: Heat some wax in a metal plate with a heat gun. ( If you have your Melting Pot, it can be great, I
 can't use it because of the different voltage, so I alter and this small metal plate is my alteration). Add the melted wax over your canvas.


Step 2: Keep your wax hot and remember that your working time is very limited, so please leave your phones and kids by themselves for 5 seconds and remember that you work with a very hot wax, so again- no kids around!
Put your star shaped sequin waist over the hop wax, glue it quickly with 2 glue squares and then add another portion of hot melted wax over the stars.


Let it cool and dry for a few minutes and then peel the waist and keep it for the future use.


Step 3: Here the fun begins: pull your paints and begin to add them from the lighter one- Ivory to the darker one. Let your paints dry between the steps .


And here are the paints I used to finish this  project


This is the canvas after I did all the painting, but before my final embellishments.


Step 4: This is your final step of canvas decoration and you can do whatever you what here. I used Tando Creative bare white chipboard stars and added a free mix of all paints I used for the canvas. Let them dry and glue some Dew Drops on your painted stars and on the canvas.


And as for my frugal advice: you can also use any white candle  wax  you already have .Same affect, less cost. I hope that you like this technique and see you again in a week for another fun technique to share.
IRIT

Thursday, November 3, 2011

Simply CAS

Happy November! Can you believe it's here already?? Where is this year getting to? I sure as heck don't know, but every time I blink, another week or two has passed!

Today I have a project I made while checking out some of the galleries on Splitcoaststampers earlier this evening (Wednesday night.) I saw this card and thought it would be fun to try it using Creative Inspirations Paints.

I wanted to make a winter scene, so I took some time with my colours. To make the gradation of the ground, through the snow and up into the winter night, I used 7 different paints. In order, from bottom to top, I used Mocha Latte, Silver Frost (just a tiny hint), Winter Frost, Blue Ice, Tanzanite, Sapphire, and Denium. I don't think the light is good enough for the photograph to show just how shimmery and wintery the card really appears, but it looks like snow sparkling on a moonlit night.

Wednesday, November 2, 2011

I Am Thrilled To Share My First Project

Today is my first post so I hope I don't disappoint you with my first attempt. I have a tutorial  to share.My mind to thinking about using Creative Inspirations Paint.
Last week I was watching a U-stream video night with  Tracy Weinzapfel  from Helmar, she made a heart canvas.
I started with these four  mini canvases.
I started by using Gesso to prime them first. Using a baby wipe to add some colors to cover that white some.
Then I chose some colors I thought would be fun for a heart
Garnet,Rustic Red, and a little Fairy Dust.
Next I needed to pencil in a heart centered between all the canvases. I was pretty pleased with my shape. Charcoal pencil was used to outline the image
I started by mixing the garnet and rustic red-I added some crackle medium, can't say I am thrilled with the results of this brand. Note to self: get some real crackle medium! India Ink and calligraphy pen are very new to me- they worked perfect to write my phrase
I decided to add some Fairy Dust at this time, I wanted a little shine on my heart. Added a little red ribbon and some flowers and leaves to dress up the corners.
Overall I am pretty pleased with my first attempt. Can't wait to see what I come up with next...lol Thanks for stopping.

Tuesday, November 1, 2011

Pretty in Pink

Today is the first day of a new month, but I thought I would show one more card in honor of Breast Cancer Awareness month which just ended. After all, there should never be an end to awareness. The flower stamp is from Outlines Rubber Stamps. I used blush and tutu pink for the flower. These paints are great for painting open areas of a stamp. The shimmer makes for beautiful flower petals. My image is layered over several panels of pretty design paper.
Barbara Washington -- designer