Hello my wonderful friends!
I hope you have enjoyed the Genuinely Jane Studios and Creative Inspirations blog hop! So much creative talent involved! So, now how about a little tutorial to get you even more inspired (hopefully) to take some time to create some art!
A couple of weeks ago, when I posted my last tutorial for Creative Inspirations Paint, it was introducing the new Resinesense, and just one of the MANY ways to use it.... with a mold. (You can check out that tutorial HERE.)
Well, today I want to continue our exploration of that technique a little farther because someone sent me a question about it. (See, send me a question, and I listen! You might even get a whole tutorial on it!)
I mentioned in my last tutorial, that you can use the Resinesense in a mold, then, after it had cured, it could be painted/colored. I was asked for more information about that. So, here we go!
Let's start out with the basic fact that Resinesense, once cured is a nonporous surface. It is a plastic. SO... If you have experience working with inks and paints, you probably have some ideas of what that means. Some things will adhere to it, some won't.
Let's take a look at some of the things that work best, and the properties they have, shall we?
1. Alcohol inks.
Alcohol inks will work well on the nonporous surface! That is what they specialize in!
The are translucent, except for the metallic mixatives. You can apply these by dripping the ink on or using a felt blender. There is also a clear blending fluid that you can use to get remove unwanted ink, blend the ink, and get all kinds of fun marbled effects. Multiple tutorials could and have been done (by others) on techniques with these inks alone!
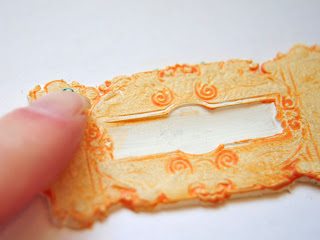
For this one I used the Gold mixative with Currant alcohol ink, and I applied it with a felt blender. Because I used a felt blender, little ink got in the indentations of the piece, making the details pop.
2. Permanent marker
This really goes along with alcohol inks as they are both a solvent ink. They too are generally translucent, and you will recognize them by the fact that they have a "smell". Sharpies and Bic Mark-its are the office supply varieties. There are a lot of craft/art alcohol markers on the market including Spectrum Noir, and Copic... neither of which I have. So, Mark-it for me. :)
Because it is a marker, the ink goes into all the crevices. Depending on your project, that may be perfect for you. You could get some really neat effects if you took the time to use multiple markers and really highlight or color in the details!
3. Creative Inspirations Paint (of course!)
Now we are getting into a little trickier territory. I suggest prepping your piece with either white or clear gesso to help give it a little tooth.
Because these are water based, they are somewhat transparent. If you want the color to light colors to really pop, I suggest a base of white gesso.
It really does look good all sparkly and painted!
Again, you can paint it all one color, or take your time with the details... all up to you and your project's needs!
It is true, however, that it will scratch of... ok, more like you can RUB it off if you rub too hard. Makes for nice distressing!
*keep reading for a tip on this!*
4. Acrylic paints
You know these. They will be opaque. Again, if you are having trouble with them adhering, a prep of gesso helps.
Pretty self explanatory, so I thought I would share a fun tip... Try using your finger to rub a darker (or lighter) color paint into the indentations to make them pop.
Just like the CI paint, this too will scratch off.
5. Solvant ink pads
Yes, you can stamp on these! Just make sure you are using a solvent ink pad... Staz-On or Ranger's Archival Ink are the two I'm familiar with.
*Ok.. So you decided to go with paint, and you have distressed it (or not) and now you want to make sure it doesn't keep scratching off.
Seal it. Use a sealant such a Mod Podge.
This isn't a perfect fix, but it does make it a whole lot more durable. I had to actually use my fingernail to try to scratch it. If I find a better sealant, I will be sure to pass it on... and if you find one, I want to hear about it!!!
Now, I'm not saying this is a complete list! This is just a very basic list to get you started. Explore. Try things out!
And remember, this is just one of SO many ways to use Resinesence! I'm so excited to be sharing this adventure with all of you!
Enjoy!
PS: I would LOVE to hear YOUR questions! If there is something you want to know or learn, let me know!


7 comments:
AWESOME TUTORIAL kASSI HAVE A GREAT WEEKEND!!
Great tutorial, never used a resin product to make my own molds but I can the possibilities!
Amazing tutorial, Kassi!!
Love everything you created!
Great tips, thank you so much!
Fabulous tutorial, Kassi! THANK YOU for the wonderful advice, suggestions and pictures!!
Love all of the options... thanks for the wonderful tutorial!!
Looks like you've had a ton of fun Kassi! They turned out beautifully, and thanks so much for the coloring ideas! :) hugs, Kimberly
Post a Comment