Inspirations

Inspirations
The color you see is the color you get!

Sunday, March 31, 2013

Inspired By: Anything Goes.....week 2

Happy Easter everyone!!!!
I wanted to pop in and remind you all about our challenge going on....

We are on week 2 of our
Inspired By: Anything Goes!
This is a sneak of my inspiration....
~~for all the details you can head back to the original posting HERE~~


We would LOVE to see all your entries!!!

Remember our challenges run for 2 weeks so you have until Saturday April 6th to link up and Diana will be back on Sunday April 7th with the Top 3, March Winner and the  next challenge!


Have a GREAT rest of your weekend!!


Saturday, March 30, 2013

Embossed Easter Card

Happy Saturday!!
I hope each of you are enjoying your Easter Holiday weekend!
I created this embossed Easter card with using a free image from Crafty Secrets
 that was shared on the blog.
After I embossed the background of my card I added CI paint Chocolate.
I randomly added this color with a dry brush technique
 because I wanted it to look rustic!
Lots of fun shimmer which you can't see that well with the picture!
For the metal embossed wire border I added Antique Copper CI paint.
To add texture to the baby chick I used some quick brush strokes and feathered them out and randomly used Sunshine CI paint color. I love how bold this color is!
Below on the close up you can see the texture on the chick.
I wanted to add texture to the plant so I used Glass bead gel and went over the white on the plant and added CI paint color in Winter Frost.
For the stems I used Mocha Latte.
I used Winter Frost on the outside of the egg and added some more Glass bead gel to the inside of the egg and use Fairy Dust CI paint.
For the chick eyes I used Coal CI paint and Evergreen CI paint on the darker parts of the grass.
I finished the card off with the lace and adding the Jeweled Inspirations in clear by CI paints.


A close up of the Glass bead gel and Winter Frost CI paint.
The dry brush texture on the chick.
Love all the amazing shimmer!


A close of up the CI paint colors!


                                               Thank you for visiting the CIP blog today!
                                                       Have a Blessed Easter!
                                                                 Michelle

Thursday, March 28, 2013

Easter bunny

Hi CIP fans!  I needed to get an Easter card done for someone, and chose this sweet Bugaboo bunny image!  I had fun with the Creative Inspirations Paint adding color to the background papers, and giving the bunny some shimmer here and there.  I've used Sky Blue, Blush, and Green Olive from the Creative Inspirations Paint colors.  While I haven't used any of the seam binding on this card, I did make some while I had these colors out.  I only use 2 small drops for about 3 yards of white seam binding, and mix it with a spray I make that has an alcohol base.  You'll see there are 2 different pinks.  There was more than a drop or two left over, so I actually added a bit of water to it and got the lighter shade.  I'll be using them in some upcoming projects.
Here's the back of the card:
Here is the seam binding:   
Here is a closer look at the CIP products that I've used:
Don't forget to check out the current CIP challenge of "Anything Goes"!
 
Thanks so much for stopping by!
 
hugs
Kimberly

Wednesday, March 27, 2013

Glittery Speckled Eggs


Hi CIP fans! Dana here today sharing a fun Spring decor piece. I picked up this small nest for practically nothing and had a lot of fun embellishing. The original eggs were plain white plastic and in need of some shimmery texture and color.


I first added a coat of Resplendence Angel Dust Glitter to the eggs.  Once dry, I used a toothbrush to add specks of color in Sky Blue, Mellow Yellow and Chocolate.


Thanks so much for stopping by today!

Tuesday, March 26, 2013

JEWELED MUSHROOM


Good Morning Friends,

Hi  DIANA L. here from DL.ART,  It is bittersweet for me today. This will be my last post for Creative inspiration paints on Tuesdays, However, you will be seeing me on Sundays.
I have been honored with the reins that Jessica from chick-n-scrap has so graciously bestowed on me.  After a year of such wonderful and exciting Challenges and a lot of entries, she is moving on. We will miss you Jessica. I am hoping you will feel as much excitement and inspiration in the challenges that I will present, and continue to enter them for a chance to win these awesome products.
The  first challenge I will host is on April 7. I will also be announcing the winners of the curent challenge.

 As you know I love doing these 3 D projects.  This is so springy and cheerful for this season and I used the Jeweled inspirations in clear on top of the mushroom to sparkle it up a bit.


This is the Mushroom house gift box
The jeweled inspirations are clear and can be set with a heating tool.
I trimmed the door with Creative inspiration paints in gold 
and put a door knob on it with a dab of paint


 Here is a close up of the mushroom cap


Jeweled inspirations:
Clear

Creative inspiration 
shimmering: gold

Remember there is a challenge going on at Creative inspiration paints right now Inspired by "Anything goes
CLICK HERE for the challenge You have until April 6 to enter.

For more information about the project CLICK HERE

Thanks for stopping by and have a blessed day, Diana

Monday, March 25, 2013

Texture and Time

Texture, texture and more texture... that is what I am going to share with you today! This texture was covered with various mists, acrylic paints, stamps, ink and of course, plenty of Creative Inspirations Paints! 

When I started this canvas, I really was just playing with varying textures on the wood piece in the center. Over time, more and more layers were added, and I realized it would look cute on a larger canvas with a nice quote on it. The canvas was painted and layered in a similar fashion using mostly the same products. I ended up using a quote on time mainly because there were so many clocks and gears on the piece. :) 

Here are some close up shots... 


The majority of the CI Paints I used were around the quote, on the embossed portions of the piece, as well as on the sides of the center board. 

Below are the colors used on my canvas.... 

Thanks so much for stopping by! Have a fantastic day!! 


Sunday, March 24, 2013

CI Paint Inspired By~ Anything Goes

Thanks to all those who joined in our " Go Green" challenge, 
we enjoyed all your wonderful creations!
 Check the post below to see the
  Random.org Top 3!
 ---------------------------------------------
Welcome back to the challenge for the month of March~
Wow can you believe how fast this month is flying by....before we know it, Easter will be here!
Anyways~
This week's challenge is:
Inspired By: Anything Goes
a fan favorite I know so I hope to see LOTS of projects being linked up!!!

Of course I have some inspiration but before I share my project I want to thank Molly, Kendra and all the very talented CI Paint DT for a GREAT year! I have decided to step down as the challenge coordinator after sharing my projects with you all for the past year. I have truly enjoyed every minute on this talented team working with these amazing paints but it is time to move on so I am turning the reins over to Diana~ you all know her from DL Art . I know she will do such an awesome job continuing these challenges!
So I leave you with my last piece of inspiration~
A cute Easter card using one of my favorite characters~ Riley the Moose.
Here he is up close~
I embossed him using black ink and Deliquesce Clear Embossing Powder.
After coloring him in using my copics I added some Resplendence Angel Dust glitter to the eggs and the chick :)
I added some silver brads to hold my banner pieces up but wanted to add some color so I painted them using Mint, Tanzanite and Sunshine paint.

I hope you have enjoyed my project and will play along with this week's challenge!!
Remember you do not need to use CI Paints on your projects but if you have them we would LOVE to see how you used them!!
As always thanks for stopping by!!
~Jessica~
---------------------------------------
General Challenge Rules

Each week you will be given a challenge to find inspiration in/from what ever the challenge theme is... you can be as literal or abstract in your inspiration as you want....Just make sure you can tie it back to the theme! Challenge closes at 6:00pm Eastern on Saturday.
You will always be able to jump back to the current challenge by clicking the "Current Challenge" link in our sidebar. The rules can always be found by clicking the tab "Challenge Rules" at the top of the page.
You do not need to use the Creative Inspirations Paints in your project, however, if you do, tell us which colors you used, and your name will go in the drawing twice! Each month, one person will win 5 jars of paint in the colors of their choice. The winner will be randomly drawn from all the people who have played that month, so make sure to join in on our challenges each week!
---------------------------------------------

Random.Org Top 3 Go Green!

Thanks to those who joined us last week for our
 Inspired By: Go Green challenge! 
Here are the Random.org Top 3:
#24~ Tracy


 #93~ Frea


 # 45~Allisa

  Beautiful work ladies!
You each will receive an extra entry in our March drawing for some CI Paints of your own!
You can grab this badge for your blog:

Saturday, March 23, 2013

be enameled...

Hello my wonderfully creative friends!

I am so excited! I am spending this weekend at a scrapbook expo!!! I am hoping to come back to all of you bursting with ideas and techniques to share!  I think it is just the think I need to really jumpstart my creative juices back into superdrive!

 In the meantime... here's a quick way to add some dimension to your chipboard or grungeboard shapes....

Step 1: Cover your shape with a layer of gesso... technically this is not necessary, but it will help the color of the Creative Inspirations paint really pop!

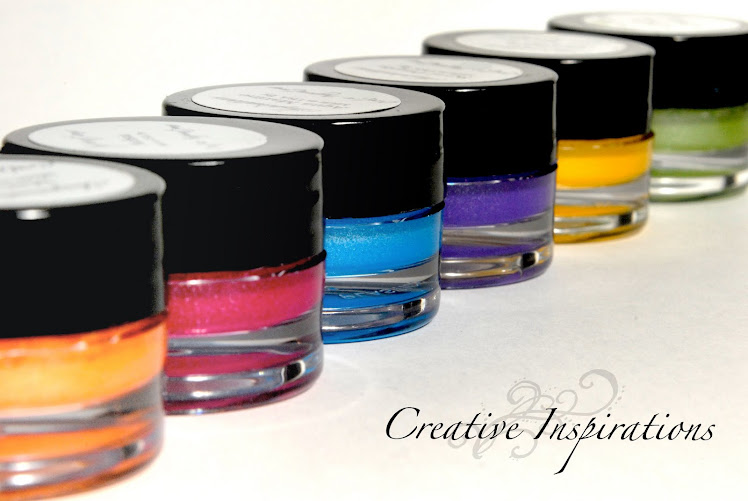
Step 2: Paint your gessoed shape with your favorite color of Creative Inspiration paint. I don't know that I have a favorite since it totally depends on my mood... they are all so pretty! I chose to use Tanzanite for this one though. 

Step 3: Using a permanent water-proof ink (like Staz-On or Archival Ink), stamp an image.  This adds a fun personal design element to your embellie!

Step 4: Cover the entire front with a clear embossing ink.

Step 5: Cover with UTEE (Ultra Thick Embossing Enamel), and use a heat gun to  melt. 

You can do this same technique with CI's Clear Deliquesce powder, but it will take a lot more layers.  UTEE particles are a lot larger, and thus will create thicker layers faster.


Step 6: While the first layer of UTEE is still hot and liquid, cover it in more UTEE powder and heat.

Step 7: While the second layer of UTEE is still hot and liquid, cover in more UTEE powder and heat.

You should now have a nice thick enamel covering over your chipboard embellie... I love how it really brings out the shimmer in the Creative Inspirations paint.. it almost magnifies it!


Step 8: Now, because you have built up such a nice thick enamel, you can reheat areas and press in other embellies like rhinestones...  super fun way to add extra accents.... you can also suspend CI's Resplendence in the layers of UTEE for a fun glittery look that won't flake off!   It is a fun technique that can be personalized to fit your  personal style and project!

Enjoy!


Friday, March 22, 2013

YT Girl Tag

Hi CIP fans and followers!  I was going through my images and came across this YouTube Girl from Whimsie Doodles!  I thought it would fun to do a tag for a change, and used plenty of the shimmery paints from the Creative Inspirations Paint store.  The paint colors used are: Aqua Marine (the background), Sky Blue, Copper, Beige, and Fairy Dust.   The seam binding is done using the Sapphire Creative Inspiration Paint.  
Here is a closer look at the CIP products that I've used:
Don't forget to check out the current challenge right HERE on the Creative Inspirations Paint blog!

Thanks so much for visiting!

hugs
Kimberly

Thursday, March 21, 2013

What Time Is It?

What time is it?  Well today's time is this clock I altered which goes a couple of years back.  I used G45 Bird Song patterned paper, some flowers from Prima which I painted a different color than what is was using CI Paints to match the colors with the paper.


 What I did was repaint the vines and flowers to match and it is amazing just how these colors seem to go perfectly well with all the papers I seem to own - not just saying that either it is TRUE!
 Added this metal butterfly
 Close up of the flowers


Hope everyone enjoyed my project today!!