Inspirations

Inspirations
The color you see is the color you get!

Friday, March 30, 2012

New Members

Can you believe March is coming to an add already?

We will be beginning a new term as of April 1st, so sadly with that we will be saying good-bye to a few talented ladies, you each will be missed!  But wish you the best in the future and hope to see you still stopping by on occasion!

Dawn, Gini, Holly and Carla will be stepping down - THANKS ladies for all the beautiful projects you have created for CI! 

With that we will be adding a few more talented ladies to the team, so please welcome each of them. 

Jessica; of Chick N' Scrap
My Photo

Favorite Color?
My favorite CI Paint right now is the Fairy Dust! I love it added on top of anything for that extra shimmer!

Favorite way to use them?
As of right now my favorite way to use CI Paints is to paint right over my die cuts. It adds lots of extra dimensions and shimmer. Gotta love that!!

----

Sandie; of Delightfully Crazy

What do I like about CI Paints?
I adore the way each paint colour has a mirage of different colours within them, they remind me of diamonds.

Favourite Colour?
(Aussie spelling in both words LOL) mmmmm, I am not sure I can pick one colour at all, but for its versatility I’ll pick Winter Frost, as you can use this colour on anything at all and it looks fantastic. You can water it down and just get a pure pretty shimmer, or do several layers and get a block colours. Love it!

Favourite way to use them?
 Painting ‘everything’ in my creations, flowers, die cuts, chipboard, ribbons, pages, you name it....including my cat (though she did so herself)!


----

Shanna; of Shanna's Designs

What do I like about CI Paints?
You can use them on anything!

Favorite Color?
Tutu Pink and Winter Frost ( Peach too)

Favorite way to use them?
Stamping in mixed media!
----

Anita; of Just a Pigment of My Imagination

What do I like about CI Paints?
I do love that they come in several shades of the same color family so I'm hoping to be able to do both my coloring and shading with the paints. I also love the texture of it - nice and creamy and doesn't streak when applied. It will be so nice to use these for some added sparkle without the mess of glitter.

Favorite Color?
Blush or Turquoise
----

Colleen; of Dietrich Designs
My Photo
What do I like about CI Paints?
The wide variety of gorgeous colors!

Favorite Color?
It’s hard to choose (really, really hard!), but I’ll go with Tanzanite. What a gorgeous shade of bluish purple.

Favorite way to use them?
Painting chipboard and flowers.

We are so excited to have each of you joining our SHIMMERY team!!

------------------------------------

The talented ladies that will be continuing:

Barbara; of Magic Delights

What do I like about CI Paints?
What's not to like! Of course, I love the shimmer. I love the ease of use. I love the choice of colors.

Favorite Color?
This is a tough question. I've got so many favorites. If I have to choose, I think I would have to say sage. I use it so much. I also love fairy dust. I think I can add it here since it's not really a color.

Favorite way to use them?
Mostly I use the paints to color images or to add shimmer to embellishments. I also love to take designer paper and add a little shimmer to it.

----

Irit; of Irit Shalom Designs

----

Kianel; les cartes de Kianel

----

Kassi; of Kassi's Creations
(She'll be bringing us 2 great tutorials each month!!)
My Photo
What do I like about CI Paints?
My favorite thing about the CI paints is the versatility. (as you can tell by my tutorials!). They can be used in so many ways, and they work so well my favorite mediums.

Favorite Color?
My favorite color has got to be Fairy Dust because I can add shimmer to anything with it, as well as make custom colors. However, I am also quite partial to Sky Blue, Lavender, Rustic Red, Ivory, and Antique Silver... So many great colors!

Favorite way to use them?
Now this one is tricky. I think my favorite way to use them changes all the time! Although, stamping with bubble wrap has got to be on my list of my all time favorites!

----

Kendra; of Luv 2 Scrap n' Make Cards

My Photo
What do I like about CI Paints?
Where do I begin?!?!  I just LOVE LOVE LOVE the shimmer!!

Favorite Color?
ALL of them!  I really like Fairy Dust as you can use it over any paper/colored picture to just add a nice shimmer!  Also really like Tutu Pink and Amethyst!  And I can't forget my favorite color...Sunshine!

Favorite way to use them?
On everything I possibly can!!  Especially like to use them to add shimmer to my colored images!  Paint chipboard or flowers!!

----

That's a look at our team for the next 6 months!  Enjoy all the wonderful creativity from each of them!

Have a wonderful weekend!

Thursday, March 29, 2012

Hope and trust canvas

Hello, my dear friends! Irit is here again and this time with my altered Mixed Media canvas made all  with Creative Inspirations paints.

I used this 6*6'' canvas and didn't even used gesso, but painted it all with lots of CI paints, over and over. Some were just drops (I added some water to the paint), some were stamped white dots, some were just finger painting. The flowers were made using some molding paste, them dried, painted with more CI paints and then I heat embossed  them  with Clear embossing powder. Some old vintage fabric was added over the paint, then I glued some Tim Holtz words from his tickets over the canvas.


Hope I inspired you this time and as you can see CI paints and embossing powders are all you need for Mixed Media art (add some gesso and molding paste and you are done).
See you next time with more inspiration.
And here are some of the Creative Inspirations products used for this piece of art


 Clear fine embossing powder


Irit

Tuesday, March 27, 2012

Art Journaling with Creative Inspirations Paint

Today I've created a page in my art journal using my Creative Inspirations Paints for the background. Let me just tell you, this page has some layers!


I painted the background with Creative Inspirations Paints in Evergreen, Aqua Marine, Royal Blue and Tanzanite. I stamped vintage typography with the Unity stamp - SheArt Print Texture. Next, I randomly brushed on some Sakura Crystal Lacquer and sprinkled Gold mica powders over it.

I stamped an embossed a heart from the January SMAK kit . I spritzed the entire page with Ranger Mists and then went back to stamping. I used the numbers background from the December SMAK kit. You can barely see these, but I love how they just add a little more depth to the page. I painted more of the Creative Inspirations Paints onto the Painted Punchinella stamp and randomly stamped that in open areas. I added a sentiment from the Donna + Unity = FABric Creations set. I let some Crystal Lacquer drip down my page, and I added more of the Gold mica powders. I then spritzed it again to help blend the whole page together.


Thanks for stopping by!

Monday, March 26, 2012

Copper Snowflakes

Hello everyone! It's Holly posting today and I am sharing a Christmas card with y'all. Christmas?? It's spring-time! LOL Yup, I saw a fun challenge on the Jingle Belles blog and I was in love with the inspiration picture there. I just had to play along, and guess what? I now have one Christmas card ready for December!


I wanted to stick with that neutral color palette, but I needed a bit of oomph to make it pop. Instead of stamping in brown, I decided to emboss the snowflakes and sentiment with Copper embossing powder from Creative Inspirations Paint. I tried to use a brown cardstock layer, and then a copper cardstock layer, but they just didn't look right. More Copper embossing powder to the rescue! I embossed the layers with the same powder so everything would coordinate. You can see the awesome copper color in this picture below:


I purposely made this card CAS (Clean And Simple) and I didn't add any other embellishments. This card is perfect for mailing with just one postage stamp. Now I'm off to make a big stash of these in different colors - I'll be ready for Christmas this year! :-)

Sunday, March 25, 2012

Inspired By: Monochromatic


Thanks to all those who joined in our "Thanks" challenge, we enjoyed all your wonderful creations! 

Check the post below to see the Random.org Top 3

It's the last challenge of the month, be sure to join in for your chance at winning some shimmery paints!

---------------------------------------------
Each week you will be given a challenge to find inspiration in/from what ever the challenge theme is... you can be as literal or abstract in your inspiration as you want....Just make sure you can tie it back to the theme! Challenge closes at 6:00pm Eastern on Saturday.

You will always be able to jump back to the current challenge by clicking the "Current Challenge" link in our sidebar. The rules can always be found by clicking the tab "Challenge Rules" at the top of the page.

You do not need to use the Creative Inspirations Paints in your project, however, if you do, tell us which colors you used, and your name will go in the drawing twice! Each month, one person will win 5 jars of paint in the colors of their choice. The winner will be randomly drawn from all the people who have played that month, so make sure to join in on our challenges each week!
---------------------------------------------

This week's challenge is:

Inspired By: Monocromatic

Here's some inspiration:


Used "Blush" on the polka-dots to give them some shimmer!

Can't you tell I love using Pink?! ;)

Have a great week!  We hope you'll share your creations with us!

Kendra

---------------------------------------

Random.org Thanks Top 3

Thanks to those who joined us last week for our Inspired By: Thanks challenge! 

Here are the Random.org Top 3:

#4 Dori


#7 Anne Temple


#5 Maria


Beautiful work ladies!

You each will receive an extra entry in our March drawing for some CI Paints of your own!

You can grab this badge for your blog:

Saturday, March 24, 2012

branching out...


Hello all my wonderful friends!  

You know, using flowers on cards and LOs is super popular right now... They add color, style, texture, and dimension. They are awesome embellishments!  Sometime, I want to add some flowers, but don't want the visual weight of a cluster, or need a larger area embellished that would look too crowded with lots of flowers... A fun way to fix this design problem is to use branches. They keep the flowers connected, draw the eye, and visually weigh a lot less than clusters. They are very elegant too!

 Now, I know that some companies make branches, but I like mine to match perfectly. (yes, this is my OCD talking. lol!)  My solution is to make my own. I can match colors, styles, and custom design it to perfectly accent my project. It's not hard either!  

So let's get our pixie dust ready, and make some flowers bloom!

What you need:
Craft wire (gauge is up to you)
Wire cutters
Paper tape*
Flowers/leaves**
Paint brushes

*paper tapes include things like Washi tape, tissue tape, floral tape, even masking tape. I like using tissue tape just because it has a printed pattern, colorizes well, and is super easy to work with.*
**You can use pre-flowers, or make your own. You will want a stem on them, so if they don't come with a stem, you will need to add one.

 Step 1: cut wires of various lengths. 

 Step 2: wrap paper tape around your longest wire (this will be your main branch).

 Step 3: wrap a smaller branch with paper tape, leaving a tail of tape at the end.

Step 4: wrap the tape tail of your small branch around your main branch to hold it in the desired place and at desired angle. 

 Step 5: repeat steps 3-4 until all your smaller branches are atached

 Step 6: paint your branch with Creative Inspirations paint. This gives it color and shimmer. Also, because CI are translucent, you will see any printed design on the tape through the paint. Awesome!

 Step 6: using more paper tape, attach desired flowers or leaves by wrapping a little bit of tape around the branch and the end of the stem. (to see how I made these particular flowers, click HERE)

 Step 7: go in with a small paint brush and carefully do touch ups where you added the flowers.

Once dry, you are ready to add to any LO, card, home decor, or altered project you want!

Just think how pretty this would look with fall leaves, or snowflakes dangling down... so many possibilities! And because you are making your own, you can design it to fit your project perfectly!

Enjoy!

Thursday, March 22, 2012

CI paints for different styles - Kianel

Hello dear Creative Inspirations paints lovers,
Kianel here with you today showing you a card i made as a challenge for myself: i.e. use a complete different style from mine with colors i don't usually use and here is the result:
The papers are from Color core and Basic Grey. The dies are from Cheery Lynn designs. All embellishments and lace are from a french online store and the stamp is a Make it crafty.

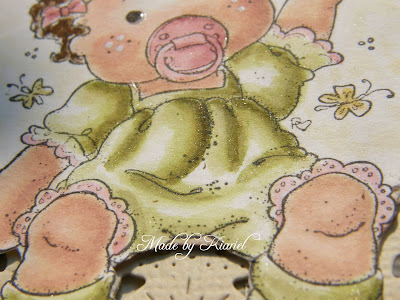
And here some details of the colouring with distress inks and Creative Inspirations paints: emerald, sage and evergreen on the wings and part of the boots. Plum and amathyst for the dress and onyx for the boots. Okay i admit it doesn't show that well on the pictures because the light is very poor but it really shines out.

And just to show that you can you can use your paints for every style, here is a card i made for the last challenge over at TOMIC which is soooo shabby and sooo different from the first card:

The papers are from Bazzill and Pion designs. The character stamp is from the brand new collection by Magnolia. The sentiment stamp is by Whimsy stamp. The dies are fom Cheery lynn designs and Magnolia. All embellishments are coming from a french online store
To colour the little baby Tilda, i used some distress inks and my beloved Creative Inspirations paints "sage" "emerald" and "winter frost".
That's it for now, i hope you will like the cards and just enjoy your Creative Inspirations paints with 59 different colors to play with and even embossing powders and glitters!
And don't forget to come and join our weekly challenge for a chance to win some fabulous paints!
Love from France, Kianel.

Wednesday, March 21, 2012

Shadowbox Garden Card

My project today using Creative Inspirations Paint is something really different then a usual type card. I decided to make a shadowbox type card. All the flowers were cut out with a rose die cut my friend had- I decided to use Mango and Citrus paints to accent many of the pieces after I lightly inked the design while it was in the die and then accented with my Spectrum Noir markers.
 I tried to share a few angles so you could see the flowers and the beautiful colors.
Here you can see the dimension of the display card and how I did a step base in the inside to layer the flowers at different levels.
That beautiful ribbon is from Really Reasonable Ribbon and is from their Ribbon of the month assortment this month.I believe the decorative brad is from SEI. The leaves were cut out from dies from Heartfelt Creations and a couple Martha Stewart punches. I just wanted to take the time to Thank Molly and the design team here at Creative Inspirations Paint-this is my last post as a design team member, I know I will be playing along with the challenges and be back in April for both of the challenges. I have enjoyed playing and painting everything I could with my paints, glitter, and embossing powders. post signature

Tuesday, March 20, 2012

Gatefold Card


My card today is a fancy gatefold card. I used dies from Heartfelt Creations/Spellbinders for the fancy scalloped tops. The first image shows the card closed. The sentiment panel has flowers and ferns from Rogue Redhead Designs stamped using mint and peach CI paints. The inside stamps and sentiment are also from Rogue Redhead Designs. All of the filigree at the top of the card was painted with fairy dust to give a luscious shimmer. Then I added clear Jeweled Inspirations for additional bling.
Barbara Washington -- Designer

Monday, March 19, 2012

Fun with PAPER

Okay, as many of you alread know, I LOVE using Creative Inspirations Paints to add shimmer to my paper!!

Well, today is NO different!

I sat down the other day and had so much fun creating this piece of paper, and let me tell you it sure shimmers!!

First the paper:
I used some bubble wrap to add some fun interest to the paper!  I just love saving bubble wrap and using it to stamp with the paints!

I also decided to get out my marbles and roll the around on the paper as well!
First, I rolled the marble around in the cover and then dropped it onto my paper.

I then used one of my paint brushes to move it around the paper.

Lastly, I thought it would be fun to use a sandwich bag to add some interest to the paper as well!

Just look at all the shimmer:
I used Sage, Tutu Pink, Mango, Sapphire, Plum, Autumn Wheat, buttercup, Tickled Pink and Spring Green!!

You're probably wondering by now what I used it for...

Well I thought it would be a great piece of paper to use to create a layout of pictures of my little guy from dying Easter eggs last year!


I didn't want to take away from the paper too much and being it was for my little boy's album I kept this layout pretty simple.

I also used some Metallic Inspirations in Matt Purple on this layout.

Thanks for stopping by!


Kendra