Hello my wonderful friends!
As an artist, one of the most intimidating feelings can be staring at a blank canvas. (yes, even those of us who have been at it for a while can feel this way...)
Maybe it is the fear that we won't be able translate what we see in our mind to what others see on the canvas... Maybe it is the decisiveness of the first brushstroke eludes us... Maybe we are just afraid we will make a mistake.
I know the feeling. I stand there staring at that stark white and it seems to swallow me whole. I have found it really helps me when I truly let myself embrace the belief that art is not about right and wrong... it isn't about making mistakes, but rather about feeling, expressing, and "dancing like no one is watching". At least that is what works for me. Everyone must find their own way in art.
However, finding your own way can get kind of expensive... have you taken a look at the price of canvases lately? Yeah... that could be part of the reason the blank canvas is so intimidating. They are far to pricy to waste!
So... how about a little faux canvas for playing with?
Gauze is much better priced in my opinion!
This works with many surfaces, however, the thicker, the better. I have used heavy cardstock, but it did curl quite a bit with all the moisture. Chipboard and wood won't curl, but it is up to you.

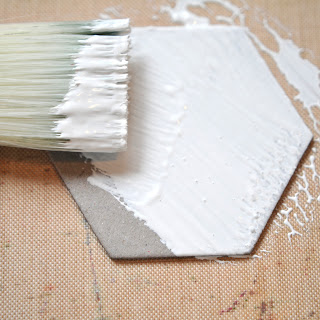
Step 1: Coat your piece with Gesso.
Step 2: While the Gesso is still wet, press the gauze into it, pulling the gauze tight. We are using the Gesso not only as a base coat, but also as our adhesive.
Step 3: Brush on a layer of Gesso over top of the gauze. I like to follow the lines of the gauze both up/down and across.
Allow it to dry.
Step 4(a): Use a pair of scissors to trim along the edges of your piece
OR
Step 4(b): Trim around your piece leaving enough to wrap around and tape on the back. This gives the wrapped canvas look that you get when you buy a stretched canvas... however, it is rather hard to do if you have anything other than straight lines.
Your choice.
From here, it is up to you what you do with your faux canvas...
of course, I'm going to paint mine with Creative Inspirations paints... LOL!
Step 1: Stamp an image using permanent waterproof ink like Archival ink. (this takes a little practice... remember it is a textured surface, so you need to apply a little more pressure than usual!)
Step 2: Paint in your image using your preferred method... I used All Purpose inks because when set with heat, they won't bleed with the next step.
I wanted to "antique" my canvas, so I made a glaze using clear Gesso, a tiny bit of Antique Linen Distress reinker, and Creative Inspirations Autumn Wheat for a hint of shimmer (love this!!!)
Step 3: Brush on antiquing glaze
A little ink around the edges, and I have a finished antique faux canvas with a hint of shimmer. LOVE!
No, it isn't the same as working on a real canvas, but it still is a fun surface to work on! And who says art has to be on a "real" canvas anyway? Not me!
Enjoy!


10 comments:
Thanks for another awesome tutorial! Your canvas is gorgeous! =)
Oh what a fun idea, and to use something as inexpensive as plain old medical gauze! Thanks for the inspiration, Kassi!
Kassi, I love your creative idea! I'm definitely going to try this.
I love your blog .This is a cool site and I wanted to post a little note to tell you, good job! Best wishes!!!
Green Onyx
This is fantastic Kassi!! I will be trying this for some small canvas pieces!! It looks awesome!!
Wonderful techniques Kassi thanks for the tutorial
DIANA L.
http://dianamlarson.blogspot.com
what a GREAT idea and gorgeous project!!
Thanks for sharing Kassi!
Gorgeous project!
What an amazing and clever idea!!
Love it!!
Hi Found your blog through Feline Play. This is so awesome. I can not wait to try this. Thanks so much for the inspiration.
This is so pretty. Thanks for the wonderful tutorial!
Post a Comment